I left the game at the point were both sides were finally confronting each other across the streams. It took six turns (about an hour of play) to get to this position. I played another 14 turns in 2 hours tonight and reached a conclusion. The following pictures illustrate what happened.
 |
| After 8 turns Hanoverian cavalry crash into the Gardes Fraincaises. British dragoons (including the famous Scots Greys, bottom) are about to charge the next French brigade along. |
 |
Another view of the same. The cotton wool 'smoke'* by the white coated infantry top left (Austrians) indicates that they have come under long-range artillery fire and must test to move the next turn.
* This is doubly appropriate because 'bavovna' is Ukrainian slang for explosion (literally 'cotton') - click here for the meaning of Bavovna |
 |
| Two turns on and not much appears to have happened. Both sides are proving very resilient. |
 |
| Next turn losses begin to appear. The first of the game inflicted on the French. In the background the Hanoverian cavalry have been replaced by Austrian infantry in the front of and flank of the Gardes. |
 |
| Wider view of turn 11. A British brigade has attacked Dettingen (middle) and has inflicted a loss on the French defenders. 3 losses results in the removal of an infantry brigade. |
 |
| Next turn, allied cavalry under the Duke of Cumberland have charged the French outside Aschaffenburg. Only 1 loss was inflicted on the French who had secure flanks and support behind.....but no where to retreat to if pushed back! Eventually one allied brigade was destroyed and one pushed back, to the relief of the French. |
 |
| Same turn, after more losses, one French brigade has been withdrawn from the front line. The Garde is being whittled down. Clever substitution of brigades by the allies kept the pressure on the French. But cavalry is brittle in TOTSK - a unit can stand only 2 losses, so they are a risky tool to use. |
 |
| This was a slow slog, but after a few more turns (see black die) gaps have appeared. Meanwhile the Maison du Roy, led by the impetuous Grammont has charged the British outside Dettingen. The British, supported by guns will see the Maison off (hurrah!) but look at that dense column of French cavalry following on behind. |
 |
| 4 turns later and the allies losses on their front formation have reached 50%, and the wing morale test was failed at the first attempt. Hence the gap that has appeared between the opposing sides. The allies have strong infantry forces, supported by guns, left, and Grammont's wing can only take one more unit loss before they too have to take a test. Several units of Grammont's wing are on two losses, so they are close to the edge too. But there is still a strong force of French cavalry and infantry blocking the route down the Main. I decided to call it for the French. A close victory. |
 |
| Back in the centre, the allies' baggage train is lagered-up - thus starting a long British tradition on the Continent! |
 |
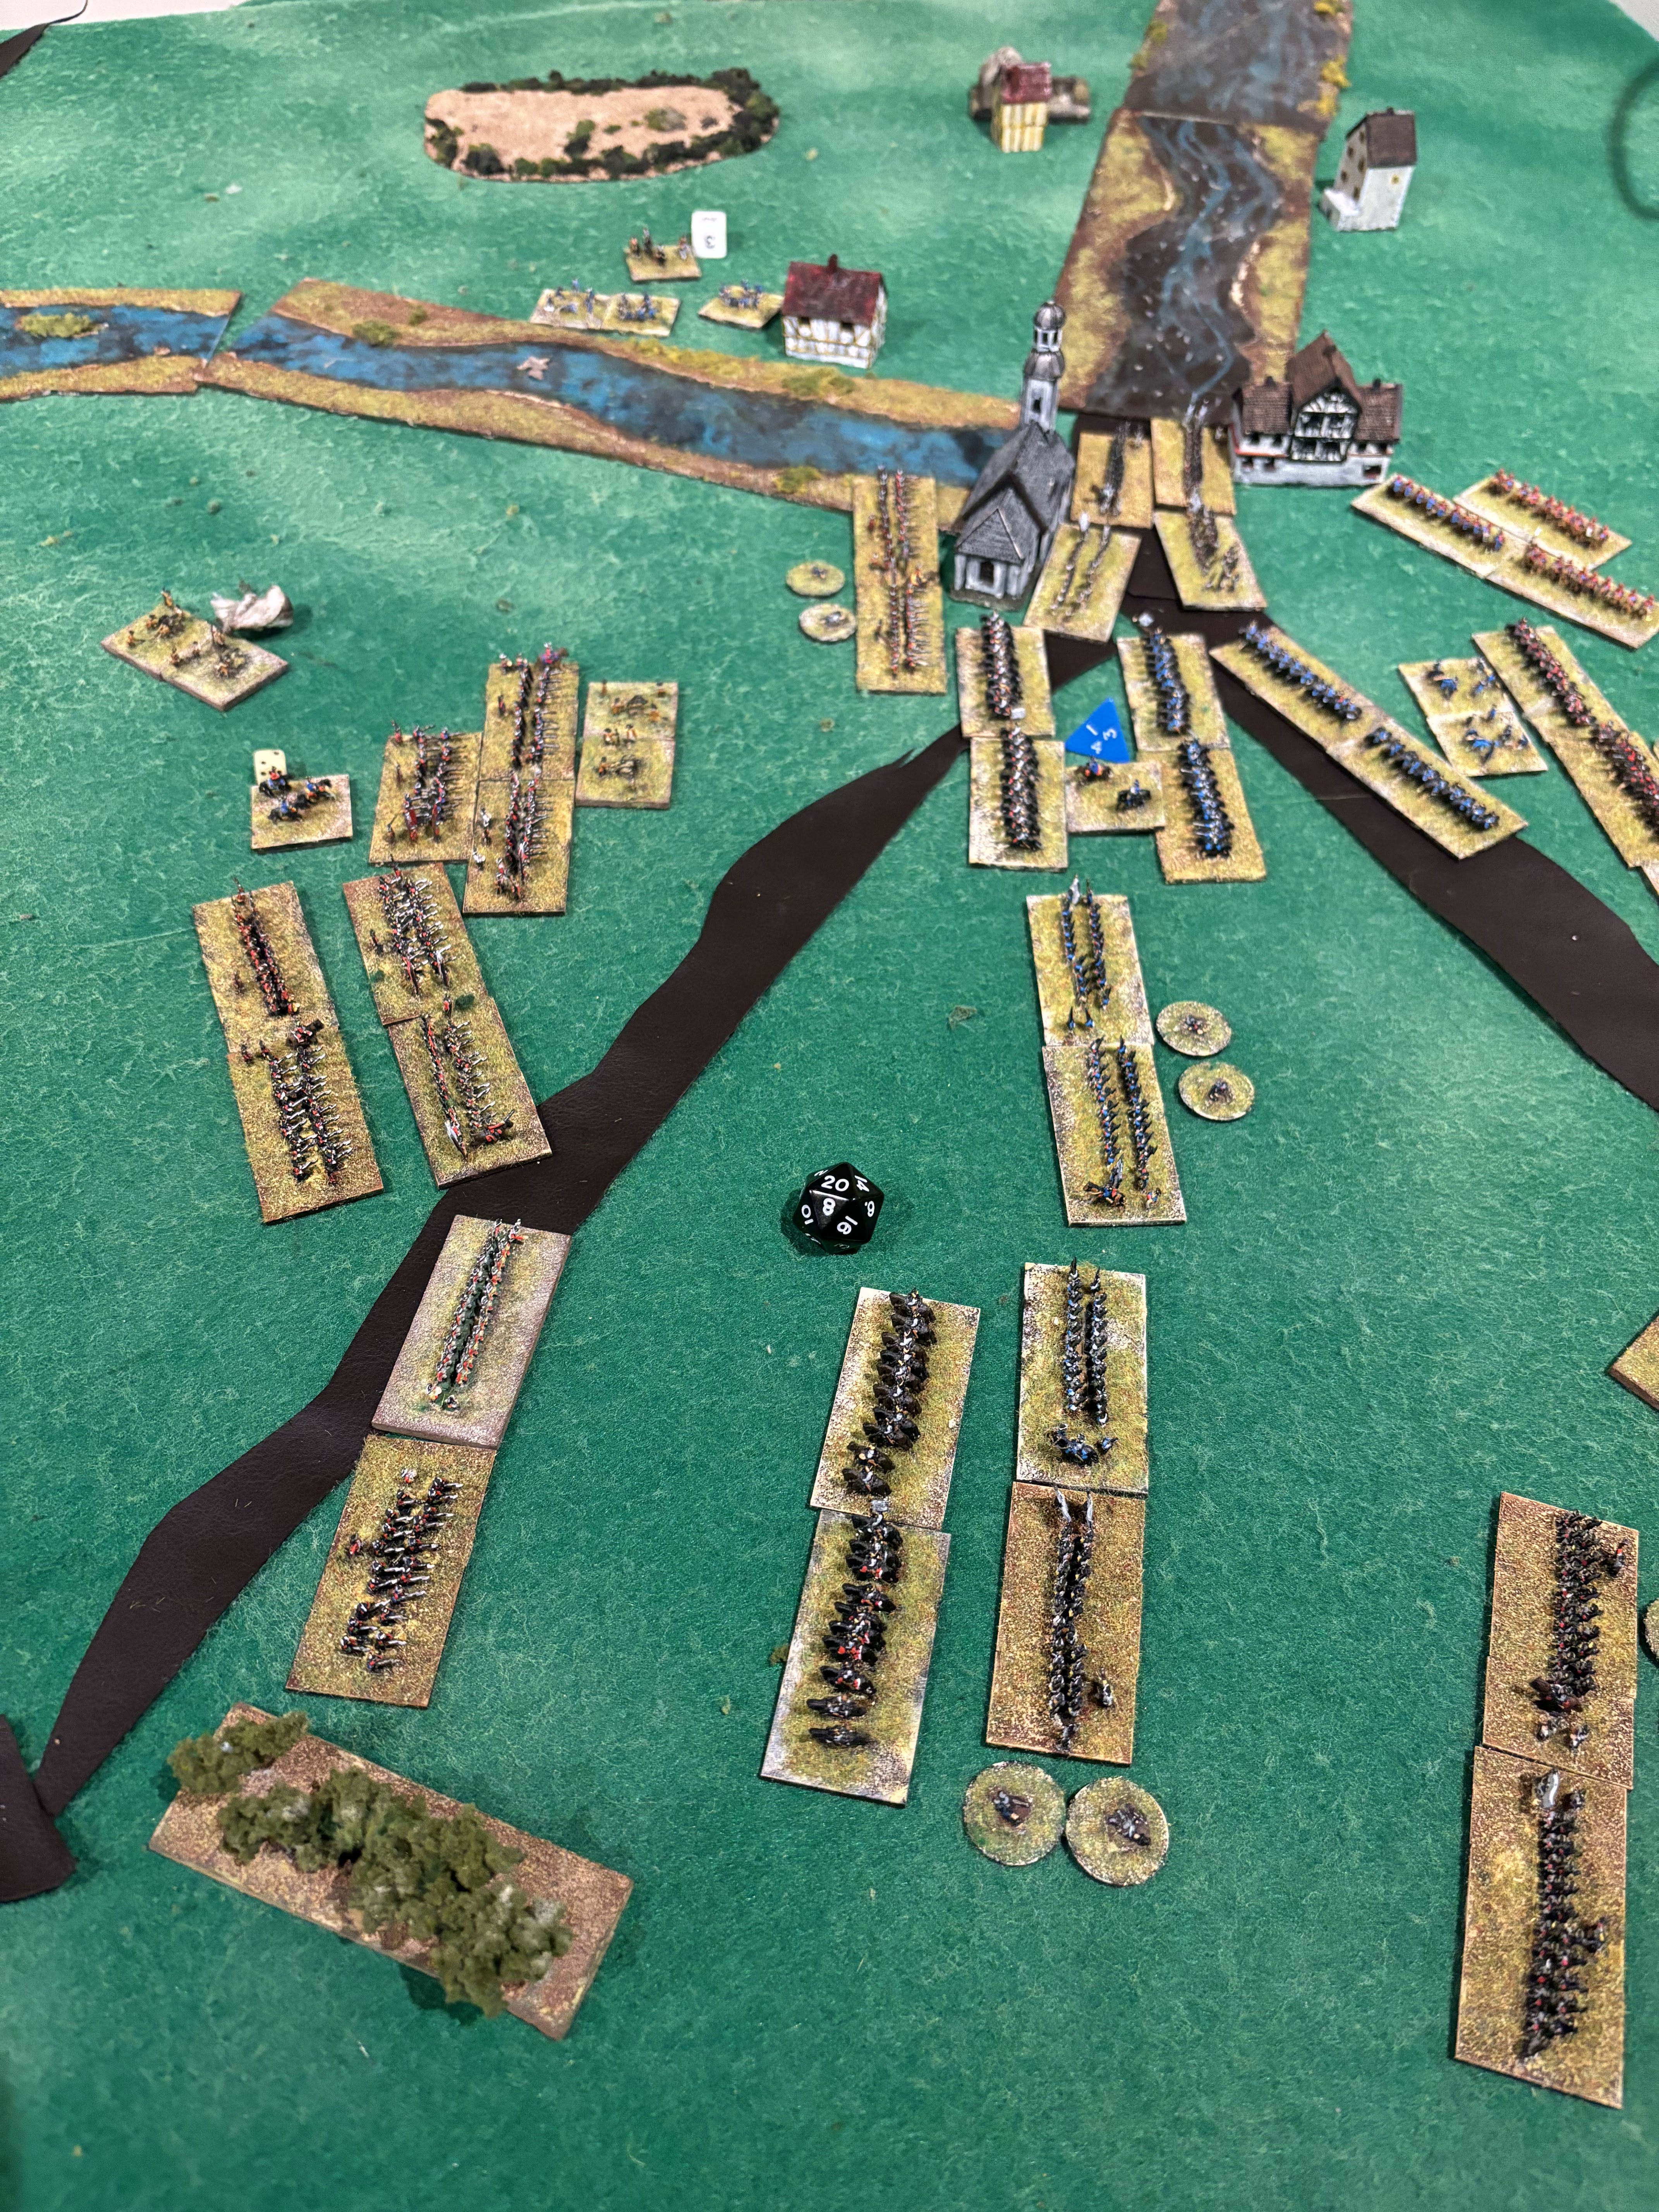
| The whole field at the end. In the foreground can be seen the large French force that crossed at Aschaffenburg (8 brigades!). Two brigades of allied cavalry under Cumberland are conducting a delaying withdrawal. |
 |
| French losses: 1 brigade of cavalry and two of infantry. More brigades are teetering on the brink. |
 |
| Allied losses: 4 brigades of cavalry and 3 of infantry (including the remains of the formation which collapsed). |
So what played out differently to the previous game? Well I attacked more vigorously with Grammont's wing. As things panned out, they were successful with action tests which allowed units to be positioned well and avoid being beaten piecemeal. The allies struggled to bring their numbers to bear at the crucial point, before French reinforcements arrived. There simply wasn't the space. Had the French suffered a wing loss first I would have been more tempted to carry on. If Grammont's wing collapsed soon after turn 20, the allies were still facing a strong force of balanced horse and foot, whereas they were deficient in cavalry, so it would have been a less than 50% chance of the allies winning IF Grammont collapsed soon.
I need to think carefully before giving this another go. Can the allies win?


That certainly seemed to be a bit of a slogging match Chris, as I guess battles in this era were, most of the time!
ReplyDeleteYes. Especially because it was a restricted front, so as long as you are sensible by not having isolated units and having support lines, it’s very hard to breakthrough.
DeleteChris
Good to see you able to finish this game Chris and a telling last view of the table, with two very distinct action going on , or so it seemed to me. Trying to manouevre large amounts of troops in a restricted space, even in the SYW, is always a tricky thing to do.
ReplyDeleteI’d say especially in the SYW (and before). Generally, they didn’t have battalion columns as tactical formations. Under these rules there’s a risk of getting caught if you are in column (a marching formation) if you stray too close to the enemy. Having to dice to change formation adds jeopardy so it makes you form line at a decent distance. That’s one of the things I like about these rules.
DeleteChris
Good report, thanks! And a close game. Glad you are finding that the rules produce credible results. Can the allies win? Well, presumably if both sides act as they did in reality, and the rules and scenario are 'true', then the result (on average) should be true to life!
ReplyDeleteIf I restrict the reinforcements allowed to Grammont then the allies can win. I think that would be their best chance. Maybe I should run it as the 'traditional' wargame.
DeleteIt does beg the question though of why Noailles didn't rush more troops to aid Grammont once the young fool got stuck into action. OR.....maybe I should only allow troops on the left bank of the Main to move after so-many turns. After all, Noailles would have heard noises of combat but perhaps didn't realise the extent of the issue until too late. With the wargamer's helicopter view of the whole field, the French player can act in an unhistorical way.
Great AAR. I enjoyed following the whole refight. Thanks for sharing. Dettingen is always an interesting fight.
ReplyDeleteThanks John. Dettingen certainly has its challenges for both sides.
DeleteChris
Great looking game Chris. Showing off the advantages of the small scale.
ReplyDeleteThanks Ben. This scale helps with getting the grand tactical level manoeuvres in.
DeleteChris
Two wonderful reports covering a fantastic looking and sounding game Chris. At the end of the first part, I wondered if the allies would ever get their army organised. It seems to have turned into a hard fight. One needs to 'have' a go with those action tests in 'Twilight of the...' rules don't you? Failure is a bummer, but put the commanders near the point where you want things to happen. I am encouraged to get my figures out (or, better still, to paint some more) and have another go with 'Twilight of the Sun King'!
ReplyDeleteRegards, James
Thanks James. What you said about the Twilight rules is one of things I like about them.
DeleteHope to see you get your troops on the table again soon.
Chris