Monday 29 August 2022

Normal Service has been resumed at Rossbach.....almost

Rossbach, Take II. A victory for Prussia, but not overwhelming. This time it played out differently to yesterday. The Prussians won, but not by a big margin. Certainly not the historical cataclysm endured by the real French and Imperialists.

Break points for the 3 armies were:

French - 10

Imperialists - 5

Prussian  - 8

This game finished after 29 turns with the following losses:

French - 10 

Imperialists - 4

Prussians - 3

So this one finished much better for the Prussians, but not a crushing victory. It appears close to a total victory on paper, but there was no prospect of the Prussians getting that final victory point over the Imperialists in the last turn. That was because once the Imperialists had lost all they cavalry (3 points down) they stayed well out of the action. The only unit left in real danger were Loudon's Grenzers. They eventually were routed, but the Reichsarmee had one VP left in the bank at close of play (notionally when night fell).

The reasons for the victory were that the Prussians got a shift on sooner - I started dicing for this rather than waiting for the Allies to reach Pettstädt. Accordingly, they were able to cross the T and form in two lines ahead of the Imperialists, and successfully charge them.

The French were a bit delayed at Zeuchfeld -  not for long, but long enough. [You have to dice for a change of direction in TOTSK]. So the Allied cavalry were beaten piecemeal. Whilst the Prussian hussars repeated their trick of appearing to threaten the Allied infantry columns, they did not stray too close to the French cavalry.

However, once the Imperialist cavalry had been defeated, the Allied infantry, guns and remaining horse began to deploy across the valley from east of Pettstädt to Rossbach. There was quite a traffic jam as the space was limited and, without the Improved Movement facility of the Prussians, forming line from column is a laborious process. Whilst this was going on the Prussian cavalry, infantry and guns, who had reached the vicinity of the Janus Hill, began to head back (west) to face the French. Eventually the Prussians prevailed, but it took until the completion of turn 29. By then it was too late to deliver the coup de grace to Hildeburghausen and his Kaiserlicks.

This just reinforced in my mind how timing was paramount, and everything had to go correctly for the Prussians to win as convincingly as they did in real life. 

Imperial cavalry start to pull away from the rest as they race for the objectives. The Prussians have got moving slightly earlier than the last game.

The Imperialist cavalry attempt to deploy from column into line, under fire from Möller's guns on the Janus. The Prussian Garde du Corps and Gendarmes approach from the bottom right.

The Prussian elite heavies smash into a brigade of Austrians who have just managed to deploy in line, but crucially their second line has not yet deployed. The Prussian cuirassiers are seconded by dragoons, bottom right.

Swirling cavalry action. The Imperialists are totally disrupted. Prussian hussars (right) led by Fritz himself have just smashed one Allied unit .

Turn 15 and the cavalry action is almost over. For now.

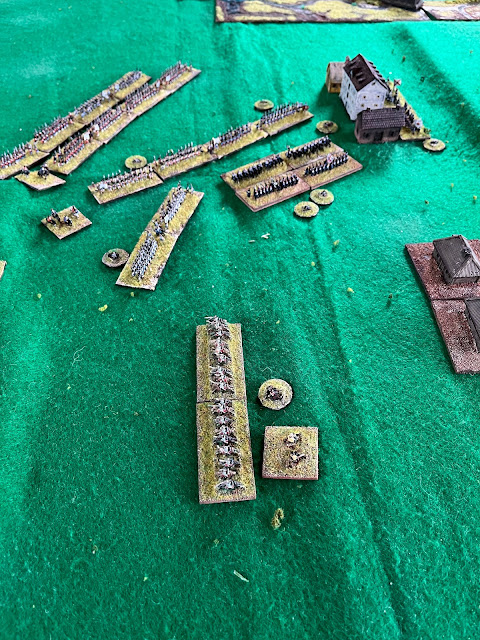
The French form lines (right) as the Prussian infantry begin to head back their way. On the  right just next to Rossbach village, Prussian grenadiers try to seal off this flank.

Looking from the right of the newly formed (or forming) French lines back towards Rossbach and beyond. The opposing infantry have begun a long fire fight. French to the left, Prussians to the right. The Swiss infantry in the middle (red coats) proved invincible, surviving turn after turn without loss until very late on. They were worthy of their historical forebears.

By turn 25 it was getting close to a result. The Imperialists (top left) on 4 losses, with 1 to go, and the French on 8 losses with 10 being their break point. The Prussians have only lost two complete units - the aforementioned hussars and grenadiers - and one general. Frederick himself sustained an injury.

Four turns later, the French had been nudged on to 10 losses, with no further Prussian or Imperialist units lost, although several of Frederick's units were getting close to breaking.

final positions. Prussians to the left and below the red line. Allies above left. The village of Rossbach is in the centre. Here rival brigades of French and Prussians slogged it out in inconclusive house to house combat. By the end the Prussians has a slight advantage here, but there are no guarantees where the Dice Gods are concerned.

A close up at the end. You can see 3 brigades of Prussians have suffered 2 losses. Two brigades of Swiss (in the angle of the red line) only have one loss each. As well as the 3 infantry brigades on two losses (1 short of routing), there were two cavalry brigades in a similar predicament. But there was no prospect of all 5 routing even if things had gone badly in the next turn. Close, but no cigar M le Prince de Soubise.

In this alternative history, the Reichsarmee live to fight another day, even if that day is a long way off, and the French had taken a battering with all their cavalry scattered. The bonfires will be lit in England but everyone will be slightly more reserved in their celebrations than they were in the real world. Frederick, of course, will still have to face the Austrians once more. It's always the Austrians.

UPDATE: ADDED

The Prussian Regiment Garde and Grenadier Garde Regiment in the front line, line regiments behind.


The Red Brick Wall of the Swiss regiments in the French army. These units, like their historical forebears, were steadfast in the face of Prussian rapid fire.*


The Reichsarmee infantry and French heavy guns at the end of the battle.

General view of the end of battle positions. The village of Rossbach with the ‘Herrenhaus’ in the middle.


Sunday 28 August 2022

Shock by the Saale! Seydlitz's Saxon Shame

No, not a reference to the anti-social disease he picked up from a lady of easy virtue*, but an allusion to the appalling performance of his cavalry in this re-fight of Rossbach. In the first contact of the day the Prussian cuirassier brigades were charged and repulsed by the French cavalry. Then the dragoons were chased off by the Austrian cuirassiers. Because Seydlitz, Prussian cavalry commander on the day, was rated 'Inspiring', his whole command were classed as 'Determined'. This meant they could take an extra loss before routing. They were therefore resilient, which was just as well as they took a pasting. The Prussians never fully recovered from the shock. 

* For those of you not into the SYW, Seydlitz was the rising star of the cavalry arm. Rasied in the saddle from a young age, he was the image of the dashing cavalryman, looking 'as if he had been poured into his uniform'. He had everything going for him, except one weakness which led to the aforementioned infection. When wounded in reality, the infection slowed his recovery denying Frederick of his services longer than necessary.

Ultimately, the Prince de Soubise was able to order a feu de joie to the glory of King Louis' arms, and a te deum was declared for the following day. Hildeburghausen fell in action, and never really recovered from his wounds. This was convenient for a forgiving empress, as she did not need to demote him for the loss of the Reichsarmee. Frederick spent the night in Leipzig where Field Marshall Keith's Finnish mistress, Eva Martins, managed to spirit up a chicken soup. He soon left Saxony travelling east with his Garde and a small cadre to pursue his business with the Austrians in Silesia. Keith was given instructions to hold on to as much of Saxony as possible through the winter. Frederick needn't have worried about Saxony. Soubise concluded that the French had done enough as auxiliaries to the Empire and retreated into winter quarters. This decision was endorsed by Louis, who, after all, did not want the balance of power in Germany to tip too much towards Austria.

The game was played this afternoon. It took 26 turns in 3 hours. To be fair, the first dozen turns whizzed by as the allied columns moved around Frederick's flanks in double moves. The photos below show how the game.

The Allied columns approach Zeuchfeld. This took about 4 moves. St.Germain  guards the flank in the foreground. Loudon with his Grenzers, is on the left.

Several moves later. The Austrian cavalry (left foreground) has outstripped the foot as in reality. Failure to get the infantry columns to turn immediately caused delays. Right foreground, Seydlidtz has made good speed around the Janus Hill. The Prussian infantry column follows on the right, whilst two brigades of French cavalry are on the right hand ridge.

A clever ploy! As the village of Pettstädt caused further delays to the Allied foot, Prussian hussars approach in a threatening move. Not wishing to be caught in column, the Allies begin to form line. Yet more delays! Eventually these nuisances are routed by a brigade of French heavies - the hussars flee on the first charge, in another case of bad dice rolling on the Prussian side.


The Unexpected Happens. The three brigades of Prussian cavalry have all been bounced by the French (top) and Austrians (bottom left). Circular bases are loss markers.

Round two of the cavalry battle. Austrians have been repulsed and now recover behind the Imperial cuirassiers. The Prussian Garde cuirassiers fight the French again in the middle, whilst the large Prussian cuirassier brigade reforms at the back. Normally cavalry brigades are eliminated on two losses (3 for a large brigade), but the Determined status in this battle gives the Prussians an extra 'life' each. This kept them in the game long enough to attrit the Allied cavalry and prevent them from rolling up the infantry.


Allied infantry columns finally get into action (approaching from the left) and top. Two Prussian brigades (bottom left) successfully assault the French batteries. Their action prevents the Allied infantry from marching straight into Reichardtswerben (one of their objectives). Just on the edge at the top right, St. Germain's infantry assault the village of Schortau where a battalion of Freikorps exceeds expectations, seeing off one brigade and badly damaging a second.

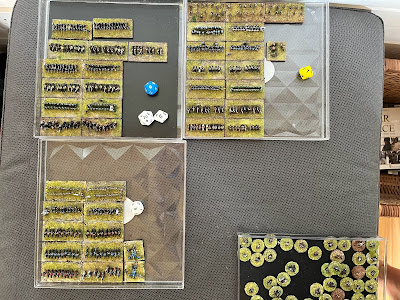
Losses begin to mount. 4 Prussians (blue die), 2 Imperial (yellow die) and  4 French (white). Only 1 Imperial unit in the tray because the 2nd was Hildeberghausen himself - the command base was recycled as a subordinate took over.

Another turn sees each of the three armies lose two more brigades/generals.
One more turn sees the Imperialists lose their last cavalry brigade to close range artillery fire. This brings their losses to 5 brigades and break point, leaving a gap on the ridge above. One Prussian musketeer brigade remains to confront one French brigade and their remaining battery.

But it's too late for the Prussians. Having lost their replacement cavalry general (after losing Seydlitz) an infantry brigade in the centre melts away under French pressure. In their part of the turn, the Prussians fail to inflict the requisite two further brigade losses on the French. After 26 turns it's game over for Old Fritz! 

The final positions. Each side has only one cavalry brigade left. The French have 9 foot brigades and 1 battery, the Prussians but 4 foot brigades including he Freikorps and one large battery.

Another view of the end - from the Prussian left flank.

Reflexions on the game.

Well that was a shock! The ease with which the French beat the Prussian cavalry left me scratching my head and consulting the rules. What 'Seydlitz' in his confidence had failed to do, was order his men into two lines. That way, if the first line was defeated they would have supports to rally behind. Instead they were chased off almost into the arms of the Austrians coming from the other side. Mind you, the French were guilty of the same mistake but got away with it. Without their cavalry, the Prussians really had a tough game not heir hands. They're close to snatching a draw at the death. A couple of hits were inflicted on the French in the last turn, and low dice rolls in each case could have led to routs.  This was the first time I've played a game with Twilight of the Soldier Kings rules that hasn't followed the historical outcome.

It was not to be. But in the words of a British cavalryman in the Charge of the Light Brigade film, "Go again sir!?  A re-set is in order as Monday is a public holiday here in England!

Saturday 27 August 2022

Rossbach Table Set-up

Good evening from a joyful Kriegskabin at the Schloß Nundanket. Joyful following another late (away) winner for Grimsby Town, and joyful because I've finally got my toys on the table for Rossbach.

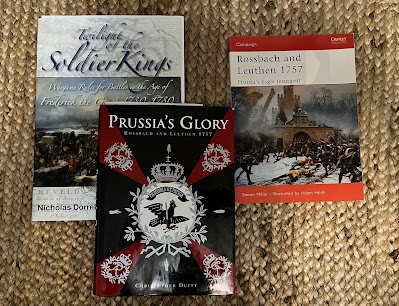
Map courtesy of Christopher Duffy's Prussia's Glory. Large rectangle is the table size and the squares are 2 ft and 1 ft respectively to aid placement. Incidentally, Duffy's scale is wrong. It should say 2km and 2 miles not 4. I checked against other maps, including satellite maps of the area.

Rossbach area today. The landscape has been transformed by open cast mines, which are now mostly lakes. Unlike many of Frederick's other battles, the site is still in Germany and not Czechia or Poland, so limited changes in place names.


I read the Helion book on Rossbach (Rossbach 1757: New Perspectives on the Battle and Campaign). Whilst it had some interesting information, it didn't change anything in how I planned to run the game. It didn't lead to any reassessment of anything in the Duffy book.

Contents page from the Helion book on Rossbach

I also flicked through Simon Millar's Rossbach and Leuthen 1757, from Osprey. Millar's text is quite brief, but it was very useful for the OOB and has a very handy map which shows the approximate timings of events. This coupled with the Duffy work and Kronoskaf, helped me plot a time schedule and using the movement rates in Twilight of the Soldier Kings I calculated that the game should last a maximum of 30 turns. Sounds a lot, but the turns do trip by quickly. 

Here is a schematic of the rival armies:

PRUSSIANS


Hussars


FK (small)


Musk

Musk

Garde/Gren

Musk

Gren


Artillery (large)

Musk


Generals


Cuir (large)

Dragoon

Garde Cuir


ALLIES


Cavalry


Austrian cuir

1


Imp Cuir (poor)

1


Imp drag (poor)

1


1st line

Artillery

Reserve

2nd line

Imperials

French Cuirassiers

1


1


Mixed Fr drag/huss

1


Fr Inf

3


2

1


Swiss inf

1


2


German inf


1


Artillery


2


Imp Inf good sm


1

Imp inf blue (poor)


1

Imp inf white (poor)


1


St.Germain


French Cuirassiers

1


Fr Inf

2


Loudon


Grenzers (large)

1


I've used different layouts above for each side as it was just easier to do. Each of the Prussian units shown above is a brigade. The numbers for the allies are also brigades. Brigades are normally 2 bases (3 for large). The Prussians are seriously outnumbered - 12 brigades to 25. To counteract, they have the advantage in quality. I might downgrade the French infantry too, as they didn't cover themselves in glory. I have given both sides a commander plus 2 subordinate generals (better quality again for the Prussians) - even though the Prussians have a much lower number of units. This is to reflect the very high concentration of command assets that the Prussians had in the real battle.

Another leveller is the split command on the allied side. I've chosen to give each army a 'break point' - i.e. number of points it can lose. This way, the Prussians don't have to wade through 13 allied brigades to make them break. I've added a couple of objective points too. Whichever of the allied armies takes the Janus Hill gains 4 points back, and whichever takes Reichardtswerben gains 2. Conversely , loss of Zeuchfeld causes the allies to lose 4 points. The rationale is that these places are crucial for protecting the combatants' lines of communication. And more importantly, in game terms it gives the sides some encouragement o follow historical routes.

Breakpoints are:

French - 10

Imperialists - 5

Prussians - 8

The VP/breakpoint idea is not the Twilight of the Soldier Kings standard method, so it hasn't been game tested with the other mechanisms. There might be a degree of tweaking necessary along the way.

Lastly, a few shots of the table

Looking along the length of the table towards the Prussian positions in front of the stream, left resting on Rossbach. Allies just off the top of the shot, except for St. Germain on the hill across from the Prussians, top right.

Prussian positions. The whiteish building in the middle is the 'Herrenhaus' from where Frederick's Capitain des Guides kept a watchful eye on the Allies.


The Allied massed columns. St.Germain on the hill in the foreground.


Wednesday 17 August 2022

London’s only interregnum church

Came across this item in my news feed today. It’s an interesting blog for a geek like me based in the metropolis

https://www.ianvisits.co.uk/articles/st-matthias-londons-only-interregnum-church-56729/

One strand I often get pinged about are Ian’s visits to London alleys!

Monday 15 August 2022

Rossbach musings

I'm still working on the Rossbach scenario. I'm trying to figure out how many turns I should allow. There is no direct link between turns and time in Twilight of the Soldier Kings. So I calculated the distances the troops moved and the approximate timings known from accounts, and then work back an average number of turns per hour. There's quite a bit of chopping and changing going on. I'm nearly there. Then I've got to finalise victory conditions. As mentioned in the last post, I'm trying to get the scenario to run on roughly historical lines. Twilight of the Soldier Kings has a default victory mechanism based on wing and army morale tests, rather than the Victory Point approach taken by games like C&C. I'm trying to work out whether I can blend the two approaches.


So it'll be a few days before I can get the toys on the table. In the meantime I'm minded to post a blog entry about some of the oddities in the Rossbach campaign. Duffy's work on it is full of interesting nuggets. Simon Millar's book on Rossbach & Leuthen, though very good in itself, has less of this colour. Shamefully, I'd forgotten I had the Millar book. Rather usefully it's got a nice schematic map with the timings of movements on them. Oh, also, I took advantage of a 20% off deal with hellion to order The Battle of Rossbach: New perspectives on the battle and campaign. Hopefully it'll arrive soon so I can see if there's anything in it that will make me re-think the scenario.

Dryer than an academic history on 16th century land distribution patterns

Went for a walk this evening in Richmond Park. Not been there much lately. Something to do with painting a French army. Did a spot of impromptu brambling. No container so I had to eat what I picked. The berries are small but sweet. Brambles, by the way, is an English (or British?) name for blackberries.

The fern is dying off early this year.


The state of the plants is quite a shock. Leaves everywhere are shrivelled or droopy. The grass is brown/yellow. We walked up to Pen Ponds (a couple of artificial lakes created by damming streams that run through to the Beverley Brook. A sign of how bad things have got is the fact these ladies were in the top pond having a drink.


I've never seen them near the ponds let alone in them (though what they get up to after the park closes is a mystery to me). There are lots of small ponds that wouldn't be oversized for a garden, and little brooks or ditches where they normally drink. Presumably a lot of them are dry now. The big ponds themselves are also showing signs of drying up. There was a party of people sat on a little 'beach' that is normally under water. I have not seen this here before.

Those tall grasses in the background are normally in the water. A drop of several inches of height of the water level.

It's still a beautiful place.


Always something new to see.

Some sort of hawk?

It didn't stay for a closer shot. Managed to catch it as it flew past, though not much more than a blur.