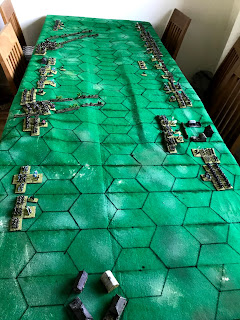
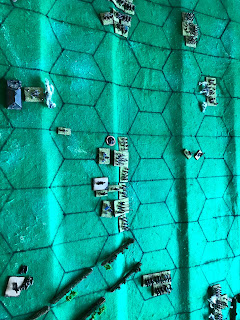
Tuesday 26 November 2019

To do list / Boxing

Been thinking about expanding my ECW horse (and maybe dragoons) but had a look at my unfinished bits and pieces while I was re-boxing the other night.

Not massive numbers of anything in particular, but these are all the jobs that get pushed back whenever I acquire more horse or foot.
  1. Finish ECW 'clubmen'. Just 'texturing the bases and a bit of touching up paint. Tempted to get more. Can double-up for the Monmouth Rebellion (in fact they're from the League of Augsburg range).
  2. Texture ECW casualty marker bases.
  3. Finish ECW musketeers. Probably at least a regiment's worth. Maybe have as firelocks?
  4. Finish ECW command figures. A few to paint and texture bases.
  5. Finish ECW odds and sods, e.g. limbers.
  6. Paint bridges.
  7. Finish AWI. Quite a few Brits done but no Yanks. Brits need cleaning up too.
  8. WWII Finns and Russians (10mm) - lots of infantry (some painted and based by Old School Tony) and AFVs. These are for the Continnuation War as when I made my first order and anxious to get something Pithead Miniatures didn't have Winter uniformed Finns. Probably a good thing really as the Continnuation War has more variety of scenarios.
  9. Touch up and base 6mm siege train, pontoons and transport. These I kept pretty generic so they could be used with any army - not that I have a fortress or a ruleset I'm happy with.
  10. Paint and base 6mm cattle/bullocks - Baccus, bought with my Naps. Too big for my SYW (H&R and Irregular).
  11. Base Leven hedges so they don't keep falling over. Corner pieces will be ticky unless I want to fix them permanently to the 'straights'.
  12. Finish 6mm gabions. I bought lots of dowels - thicker for my 10mm figures and thinner for 6mm. Cut into appropriate lengths they make cheap and half-decent looking gabions. Which are needed in large numbers for sieges.
Obviously this is all excluding anything that appears on the acquisition list. I could probably do with a regiment more of ECW foot as well as the horse, plus more mounted officers. Oh and throw in some civilians and peasants armed with tools. And a more permnent solution for roads (rather than masking tape) and watercourses. And a lake for the Karelian front. And expanding the AWI collection (I fancy having a go at Loose Files). And maybe the late 17th century........Oh nearly forgot high brick walls such as you'd see around a place like Hougoumont. Or Richmond Park/Ham House.

In case you are still reading.....Reboxing of my 6mm SYW and Napoleonics has been completed. I was buying Ferrero Rocher* boxes 1 at a time until last weekend I thought 'who am I kidding?' I'm going to buy more so why not do it in one go. As it was the five extra I bought are now nearly all full. I will need more for the AWI and WWII collections. My old Ikea boxes have been repurposed for terrain bits, earthworks and buildings.

For the record the FR box numbers are:
  • 6mm SYW:  10
  • 10mm ECW:  6
  • 6mm Naps:    5
Each box is 21cm square by the internal dimensions, and about 3.5cm high internally. 

The whole lot. Not bad for 7 armies.

8/10 of the SYW collection

ECW and 2/10 of SYW

Naps

This will also necessitate re-organisation of the cupboards in the dining room which contain books, files and glassware (whatever next?) as well as the collection. In fact books around the house need a re-org too because the ECW collection has grown the female members of the household never puts things back where they belong. I have acquired a built in shelf in the new stairway, built last year for the loft extension. Conveniently positioned for my place of easement too. I suppose I could put my toys in one of the 'new' built in cupoboards upstairs but that's not so convenient for the dining gaming table. Hmmm.


* for the reason why see the old post Boxing and Basing, or ‘Ambassador, you are spoiling us’

However. All of this just eats either into gaming time or my 'wasting time' time. Maybe I should give some of the latter the heave ho and start making more productive use of my evenings.

Sunday 24 November 2019

Surbiton, 1648 - the Wargame

Having done the background reading and map searching, I had to work out how I was going to approach this game. With both sides only totalling 1000 men my normal troop scale (something like 1:20) would give a very limited game. If I doubled the groundscale and unit frontages I would have limited space on my table which is only 3 feet - 900 yards deep under normal rules but only 450 with the new groundscale. I need a bigger table. But then I realised the distaff side of the household were all out of the way and the living room floor was all mine! It meant crawling around on my knees, and having to be extra careful where I put them, however I would have a space 5 x 8 feet (750 x 1200 yards). Enough space for two small forces to manoeuvre.

Orders of battle
I plumped for the larger end of the estimates given in the article yesterday. So the Royalists had 600 men and the Parliamentarians 500. Arbitrarily I decided the Royalists would be split 50:50 horse and foot, with the foot slightly lighter on shot it being a scratch force. The 300 horse would be in 6 troops of 50.

Parliament would have one small unit of foot, 250 strong with a 2:1 shot to pike ratio. The horse would be in 5 troops of 50, all veteran New Model Army men. Neither side had any guns.

Royalists (Earl of Holland)
6 troops of 50 = 300
1 small regiment of foot = 300

Parliamentarian (Sir Michael Livesey)
5 troops of veteran horse = 250
3 companies of foot = 250.

The game
The Royalists aim was to get a small wagon train and as much of the foot off the table in the direction of Kingston.


Royalist foot heading north along the road preceded by the supply train. The horse form up on the hill ready to intercept any rebel troops.

Close up of the Royalist horse, in 2 squadrons

Royalist foot march along the road to Kingston


The Roundheads in pursuit are passing Talworth (Tolworth)

3 troops of horse (from Ireton's regiment) sweep round to the east of the coulmn


The road ahead is blocked by a broken waggon so the foot have to buy time and form up. To their left a fleeing Royalist troop is pursued over the hill by Parliamentarins.

Swirling cavalry action on the plain. The Royalists have beaten one troop of Roundheads, but are struggling to make their numbers tell against the crack enemy horse. The action ebbed and flowed here. Despite getting the worst of it in terms of 'hits' the Royalists proved quite resilient. The corollary of this is that whilst they did not rout, they suffered more and more base losses. A brave but doomed fight for the King.


The Royalist foot have a choice: resume the march and risk being ridden down by the Roundhead horse or form a 'hedgehog' and hope that their own horse prevail

The Roundhead horse prevail. Left, one troop returns from pursuit to aid their comrades.

Livesey's foot turn to face the remains of a Royalist troop who have chased off one Roundhead troop (who have gone haring off in the direction of Ewell crying 'murther, muther'). Caught in several minds what to do, the Royalists neither evade nor charge. As the Roundheads approach within 100 yeards they open fire and scatter the remaining troopers.

The wagons have successfully escaped. The foot will deploy again and are charged by the small unit on the hill, but successfully beat them off.  The remains of a Royaist troop rally in the distance, no longer being pursued. They will advance to launch a suicidal charge to buy time for the foot to escape.  It is a forelorn hope for Livesey's victorious squadrons and foot are advancing quickly from the south. The Royalist foot would have to surrender - with no friendly horse left it would be a foolhardy sacrifice to fight it out.

So another Roundhead win (in line with history). Sorry JBM. The action was hard fought however, and the Royalists put up a better fight than historically.


The Battle of Surbiton, 1648

It was approaching two o'clock at night when Colonel Sydenham Hill was rudely awoken by his servant Iphonius Severn with the news that Hill's daughter was nearing home. "At this hour!" exclaimed Hill. "It must portent something serious why she is travelling at night. I will meet her upon the road". Orders were issued to prepare one of the nags in the stable at Mont Plaisant, Hill's home outside Kingston. Before long Hill, accompanied by Severn (like Hill a veteran of the late war against the King), was trotting on his wife's white mare towards Coombe Hill. Lady Grace's coach appeared out of the drizzle. 

The daughter, accompanied by her chaperone naturally, had lately returned from the Empire where she had been taking the waters at Aachen and had there picked up gossip doing the rounds amongst English emigrés in the city. The Low Countries were buzzing with similar stories. Supporters of the King were to exploit discontent amongst the people across the country, seize key towns and passes. They would hold them pending an invasion by the Scots who would return the king to power in return for granting privileges to the Presbytarian faith. Of particular import to Hill, a gathering of Royalist forces was to be held at Banstead Downs before seizing Kingston Bridge and marching on the City. Hill had lost his commission in the re-modelling of the army 3 years before, along with some of his influence. Yet he was still loyal to Parliament, for now, and would take his news to Fairfax. At 56 he was not keen on returning to campaigning, but he hoped maybe for a sinecure or some other favour from Parliament. Further, the last thing he needed was a band of marauding Cavaliers running amok on his estates, especially as he had gained some celebrity beating their Northern brothers 5 years before.

"Yes, yes, yes." the weathered Yorkshireman had impatiently dismissed Hill's 'news'. "There is no security in the Cavaliers' counsels. Every tavern between Leiden and Leeds is full of it. We know about the planned levee in Surrey. We have it in hand. But I thank your loyalty all the same my dear Sydenham. My complements to your women folk sir. Now forgive me but I am rather busy."

Within days the Earl of Holland's band of Royalist rebels had seized Kingston. However, the rapid arrival of a troop of Ireton's regiment from Windsor saw them flee the town and head further into Surrey. Through Ewell, Leatherhead  and Dorking the Royalists marched to Reigate. Unsettled by an attack by 3 Roundhead troops outside Reigate, Holland abandoned the town. Followed from post to post in Surrey by elements of the army and militia under Sir Michael Livesey, Holland marched his force of 5-600 back towards Kingston. Livesey's command was a similar size (4-500 according to the History Today article) composed of five troops of horse and three companies of foot. At Surbiton Common* the two forces met in a brief action that ended with the scattering of the Royalists. One much commented upon death, was that of the young Royalist Lord Francis Villiers, younger son of the first Duke of Buckingham, who rode into battle alongside his brother George, the second duke.

Some of the above may a figment of my imagination. Being awoken at 2 to meet my daughter from a school trip to Aachen may well be true.


I remember reading a short account on line a couple of years ago but have been unable to find it again. It isn't even mentioned in the BCW Project http://bcw-project.org or on the Battlefield Trust website (not surprising as no one is certain where exactly it took place).  I found an article in History Today, paid my subscrition and downloaded the article. Note to self - return to the History Today archives before the subscription runs out!

* The History Today article mentions that Surbiton Common was about a mile and a half SE from 'the modern Southern region station'. I presume this means Surbiton station but I'm sure rail buffs could correct me (maybe it means Kingston station?). Surbiton Common doesn't seem to exist on current maps on line (all my 'research' for this was done from a laptop). I found reference to it in an article about the development of Hook (north of Chessington) which places it in that area. 19th century maps show an area called Kingston Common in the same general area. This would also roughly fit with the account given in History Today ‘upon a hill in the mid-way between Nonsuch and Kingston’ (possibly quoting Major Awdeley, an officer of horse with the Parliamentarians, but the citation is not clear). I've circled the area on the map below.

Map from Visionofbritain.org.uk. Possible area of the battle circled. Nonsuch Park is right at the bottom, just right of centre.


The area indicated contains hills, so that fits. The tendancy would be to pick the ones that appear to be either side of what appears to be the modern Ewell Road, being as its name suggest the route from Ewell (next to Nonsuch). The centre of Surbiton itself has moved southwards, now occupying ground in the NE corner of the circled area. Interestingly, there is a modern road which crosses the Hogsmill River just east of what is marked on the map as 'Leatherhead Mill'. This road is called Villiers Road, and Villiers Avenue, which ascends the hill at the top of the circle. Town planners around the turn of the 19th century must have had their eye on local history when they named this road. Less auspiciously, town planners in the later 20th century placed the 'municipal dump' (or to give its grander, official title 'The Household Reuse and Recycling Centre') on land next to Villiers Road.

A couple of other places on the map worth noting. There are two powder mills marked by the Hogsmill. One by the village of Malden, and one just NW of Ewell Court (bottom centre of map). I have no idea whether they would have been around in the Civil War, or even if they were for gunpowder. Maybe I need to root around the 'local history' books in the library (though these are typically just compendia of 19th and early 20th century photographs). Another site to note is Cannon Hill just west of Merton on the right hand side. I've been up there and it is a particularly commanding site, and I like to think of it as the location of a battery. I'd be interested in finding out more about these places and what they really were. If anyone has a clue, I'd love to hear from you. Obviously you'll have noted Hampton Court Palace, and maybe Richmond Park to the top. Just off the map heading north along the Thames is Ham House and further up, the site of Richmond Palace. These things have my tiny mind thinking 'imaginary mini-campaign'. I need some high brick walls first though....

Anyway, onto the wargame. Coming up next.

Wednesday 20 November 2019

Hex. The Movie

This was put on my, erm, radar* by Radar of Keep Your Powder Dry fame.

Hex (2017)
https://www.imdb.com/title/tt7335324/

As Radar points out, there are other movies of the same name, and Amazon Prime confusingly has it labelled Hex (2019). For my tuppence 'apporth, it is well worth watching, and is actually better than what comes across in the trailer on IMDB.

IMDB has the budget down as an estimated £1000. Judging by the credits, this was acheived with a lot (free?) family input. But it doesn't show. It is amazing what can be acheived with a simple plot, lots of close up shots and atmospheric music.

For me there's both a sense of war unleashing unexpected horrors (more deaths occurred away from the battlefield), and people putting their differences aside when there's a greater outside threat. The surprising thing is how few ECW themed films and TV programmes have made it to the screen in this era of the Great Brexit Schism.

Definitely the better of the two horror stories** I watched this week. This one left many people doing impressions of Michael Jolley.


* sorry, couldn't resist this.

** or this cliche either.

Tuesday 19 November 2019

Lincolnshire Campaign III - the Leaguer of Grimsby

The matches are lit. Prayers are being said. Firearms primed. A Roundhead deserter (probably a former Royalist soldier who had been offered the choice of 'freedom' shouldering a musket in a rebel regiment or labouring in a saltpetre workshop) had made his way into the old port of Grimsby the night before bearing news of the intended assault on the morrow. The Royalist regiments stand to. Battered in the great battle of Clee Fields five weeks before, astounded to have been thrown back by the Roundheads, they are now rested and ready to give a good account of themselves.


Map of the town from 1620s. This map covers much of the western part of the battlefield, with the Parliamentarians occupying the area of the old abbey and to the west of Bargate (the road heading roughly south to north)

Taken from a map c 1820. The area of action concerns the Old Town, the old haven to its right and Holme Hill further to the east, and the area south of the West Marsh. The location of the Battle of Clee Fields can be seen to the east of the map.

18th century plan of the town. Not much has changed since the 17th century.

God looks down on the old town. 'Will it burn, this home of the old pagan Grim', he asks himself as he surveys the eastern marshes and the approaching columns. He rather hopes not because of its association with fish, the symbol of the early followers of his son.
The two sides at the start of the fateful day. Bargate runs directly north on the west side of town coming from the site of the nunnery north of Sartho. The Abbey Rd branches off Bargat immediately at the south of the picture and enters the town on its eastern corner. Brighowgate branches off further up Bargate. The old high street (now Victoria St) cuts across the town east west. Parts of the East and West Marshes can be seen at the top of the picture. The old haven is immediately to the east of the town - its silting up from the 15th century led to a decline in the towns fortunes, but it still retained its two MPs from its days as a major medieval borough - one, Gervase Holles fought for the King in this campaign, the other (Christopher Wray was with Manchester's main army.
The eastern approaches. The East Marsh top left. Parliamentarian columns march up from the south, guns behind the wall of gabions. On the small eminence known as Holme Hill the Royalists have built a redoubt to command the eastern approaches and haven.

The commander of the Royalist battery on Holme Hill salutes his Roundhead adversary and invites him to shoot first. The cavalier battery is armed with heavy guns landed from a Dutch ship. More of the same form the arsenal of the town itself. A fortunate gift from the sea as the King's men had lost all their guns at the Battle of Clee Fields. Some of those guns are now turned on their former owners.
View from the grounds of the old papist abbey looking north towards Grimsby. Here the Royalists have site one of the large cannon from the grounded Dutch ship.

West of Bargate, the Parliamentarians eye the Cavalier guns guarding the defences on Brighowgate. More guns sit to the west towards Cartergate, by the church of St James.
The Parliamentarian guns commence bombardment of the redoubt on Holme Hill and the barricaded gateways to the south of the town with no effect despite some accurate gun laying. This is owing to miscalculations on the part of their commander who didn’t allow properly for the effectiveness of the defences - he really should have laid guns and the lines at closer range!

Nevertheless, on the right flank a cavalry regiment and the Red Regiment advance on the flanks of the redoubt. The plan was for the horse to drive off any supporting troops and for the foot to storm the earthworks, but on arriving to the north of the redoubt Lt Col Dickerage Lane saw there were no support troops and promptly ordered his troopers to dismount and to storm the redoubt from the rear. The startled gunners waited not upon their honour and climbed over the palisade and ran down the hill hoping to escape into the East Marsh.


The Blue and Tawny Regiments form column ready to assault the eastern approach to Grimsby


Meanwhile the defenders’ attention is drawn to the small unit advancing along the abbey road. Hidden behind the small column of foot is a wagon full of gunpowder barrels to blast an entrance into the town.
Further West the Yellow Regt has climbed over the Countervallation and makes ready to advance on the south western corner of GY. In the far west a cavalry regiment comes up against the West Marsh and its colonel is trying to get it to turn east to escort a second powder wagon, which has somehow been able to follow its orders, but is in danger of leaving its escort behind.


Meanwhile the Royalist White Regiment in reserve is being rushed to the eastern perimeter to meet the assault there.
The redoubt successfully taken the Parliamentarian foot and guns follow orders to turn to the town. It takes longer to rally the dismounted horse who are pillaging the abandoned redoubt for anything worth having - apart from the guns and ammunition, there are slim pickings so after a while they too return to order and remount.


The Light Blue Regiment has successfully driven off the gunners at the southeastern gate and maintain good order ready to be turned against the defending infantry.

The Tawny Regiment forms in line by the eastern earthworks ready to go over. The Royalist reserves arrive and form up just in time. Frantic shouts to redirect the eastern powder wagon are ignored or are not heard and it continues along the Abbey Rd. Literally a powder keg that might hoist the Roundheads with their own petard!

The western powder wagon has managed to get through despite fire from the Royalist dragoons at that gate. The charge is ignited and…..it explodes!! Unfortunately the defenders fire has put the engineers off and they weren’t able to place the wagon properly and the explosion has little effect bar scattering wood and horse flesh across a wide area and blowing some hats off the supporting Yellow Regiment. The Yellows now advance within close range ready to release their first volley in the teeth of the defenders. Simultaneously the Roundhead batteries have shown rare drive and bravery and moved aside their gabions and are manhandling their guns to get close range shots at the defenders. Their Godly zeal must burn bright, Praise be to the Almighty!

The crisis approaches. The opposing foot have been engaged in a hitherto ineffective firefight. The Royalist shooting had been particularly bad - it must be due to the damp conditions in the town. The Tawny Regt was bloodily repulsed from the parapet by the White Regt and some of the Roundheads had to retreat into the marshy Haven. Nevertheless their General urged them on and they took up the firefight again. But all along the line the Roundheads are now beginning to drop. The only unit engaged that has not been battered is the Light Blue Regiment, having driven off the artillery and repulsed the Grey Regiment.


Can they break the Greys? Can the Parliamentarian right wing arrive in time to tip the balance?


The crisis is not over but the Roundheads are returning to the fray.

The right wing infantry have engaged the defenders on the eastern rampart and the artillery has pounded the earthworks reducing their defensive power.

The Light Blue Regiment has seen off two units of Royalist foot and have just repulsed a cavalry charge, the musketeers having entered buildings while the pike hold forth in the street.

Only the dismounted dragoons, one small battery and the horse remain intact from the early morning. It must be close to decision time. Break off and escape west towards Barton across little known tracks through the West Marsh, or try to hold on?

End Game: The Roundheads are pouring into the town from all southern and eastern entrances and are pushing back the Royalists through the streets. Only a counter-charge by the Blue Horse has seen off the Roundhead cavalry preventing defeat being turned into a disaster. The Dragoons unbowed again but fail to drive off the Light Blue Pikemen, those veritable Alexanders!, who capture the remaining guns before they are towed away. Remnants of 3 battered infantry units, the dragoons and all the horse escape over the bridge and across the West Marsh.


They will only pause to pillage Immingham, that nest of Puritans, once they realise the Roundheads are too exhausted to launch a full pursuit.


Tuesday 12 November 2019

The Winter War - Talvisota (movie)

Tell battalion that the next people in the bunker will be archaeologists

In August I mentioned that my lovely wife had bought me a couple of DVDs when she was over visiting her mother. Towards the bottom of here

I watched the first set, Tuntematon Sotilas, soon after and thoroughly enjoyed it. So with naff all on the box last night I intended to watch the first hour or so of Talvisota. At 191 minutes long I thought I would space it out over 3 evenings. The fact that the 'or so' part of 'first hour or so' extended to 'the whole three hours plus' tells you a lot about my feelings on the film. And this was my second viewing (I'd seen it a couple of years ago on line).

According to Wiki there were 3 main versions released. The international cinematic version (127 minutes), the one I saw (the original Finnish cinema version) and the extended TV series at a whopping 275 minutes.
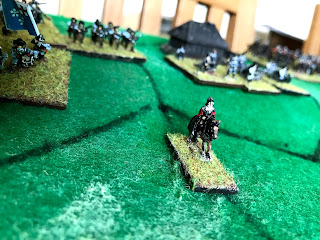
The basic plot concerns a small sub-unit (don't they all?) of soldiers called-up in October 1939 ('for manouvres') and what happens to them over the succeding five months. Naturally, the bulk of it is the 100 days of the Winter War. As with all films of this genre, the sub-unit gets whittled down and you begin to wonder whether the main character Martti Hakala will cop a 'Bäumer'.  I'm no WWII specialist so I don't know how realistic the action scenes are (if anyone has seen it and has a view I'd love to hear it). It seemed plausible to me (even if the Soviet tactics shown were mostly suicidal, which I understand they largely were).

One facet of this film that I appreciated were the little insights into what life was like then in Finland - still a mostly agrarian country. As with Tuntematon Sotilas, I found some of the 'homefront' scenes touching. We see a society where most people didn't have much, didn't expect much, but nevertheless felt that they had enough worth protecting - though that wasn't necessarily material. It seems almost as if there was a collective expression of "look our ancestors came to the most inhospitable part of Europe, hacked out a modest living out of unpromising material, kept ourselves to ourselves, and you lot still want to bother us and ask for more".  Maybe that's just me with my biases.

We also see a society where Christianity still had a big influence culturally and socially. In one scene the singing of a Christmas Carol becomes an act of resistance. Probably like my grandparents generation here, they all knew the words.

Also much appreciated by this blogger is the deadpan Finnish humour, that goes with the no-nonsense approach to troubles. If you get the typical British wartime humour, you will like this. The sort of thing where a quip is made out of the corner of the mouth, with a fag* in the other side. The Russians are nearly always 'naapurit' ('the neighbours' - e.g. 'the neighbours are trying to move the garden fence again') when not 'Ryssät' (which I understand is a more perjorative than 'Russkies').

The special effects are pretty good on the whole, especially when the film was made in 1989 - it coincided with the 50th anniversary of the war. We're now approaching the 80th and that generation is nearly all gone. Although the Finns ended up on the 'other side' in 1941, I can only honour and admire their sacrifices in defending their homeland and freedoms**. Just as I would honour the poor bloody sods who were sent to take them away and suffered unimaginably in a frozen forest a long way from the steppe or from the warm valleys of the Caucasus.

I'll raise the mood a little now by reference to a song (or rather tune to a song) that got played a couple of times by one of the characters in the section. This was originally a hit in the 20s (I read somewhere it was the first 'pop' sensation in Finland) and there are many clips (from several countries) out there in the interweb of different versions (sometimes simply called "Emma" or "Oi muistatkos Emma?","Emma's Waltz", "Emma's Valssi", or "Finsk Vals" or variations of that - yeah I am obsessive.). All lovely because it's such a great melody. It's been a while since I inflicted any 'obscure Nordic music' on you, so here you go. And I'm sure many of you will appreciate singing along in your French farmhouses, so this one has helpfully got lyrics on screen. Or just take the missus for a waltz around the kitchen table.

 https://www.youtube.com/watch?v=9dpcVRW8DfI


* for clarity, this is British-English for 'cigarette' (and in such cases it nearly always is a 'fag' not a 'cigarette').
** For anyone so inclined to point it out, no I'm not ignoring the unacceptable things that happened in the Continnuation War....but to coin Basil Fawlty in 'the Germans' "Yes you did, you invaded [Finland]".


Monday 11 November 2019

Cheriton II

Eight weeks since the last attempt at Cheriton, I got around to having another go. That was played 'traditional' style without a grid, using my own ruleset (pretentiously named 'Jacob Astley's Prayer'). Since then I'd fiddled around with different hex grid sizes on paper and then finally plumped on 13 cm 'across the flats'. This is just a tad wider than three foot stands or 4 horse stands in my basing convention (4cm wide for foot, 3cm for horse). I went slightly larger because 13cm can accommodate the largest of my building models and having a gap between neighbouring units looks better.

High ground was created as usual by DVD cases, then my now gridded, green baize cloth was thrown over the top. The table at 3 feet deep could fit 7 full hexes and two partial hexes (I would count units in these as being completely on the table if needed). I made a slight change in the layout compared to the previous outing. I added buildings representing the village of Hynton Ampner - I omitted it last time but a re-reading of Adair showed it figured a lot in the actual battle ......according to Adair. I placed a hedge row in the hexes in front of it representing the hedges along the road. As before, the Royalist horse had to suffer a scenario specific rule making them advance on to the field initialy via the hedge-lined Broad Lane and Alresford Lane before they could attempt to deploy in the meadow.

Initial set-up. Cavaliers to the left, Roundheads to the right. The lanes marked by the hedges in the left centre and top left.

Two Parliamentarian battalia defend the hedges in front of Hynton Ampner. Four companies of dragoons behind to their left

Ralph himself, on the forward slope of what Adair terms the South Ridge. Confusingly on the north side of the battlefield.
Now the rules. I have been intending to try the esteemed M. Foy's ECW_CnC variant but haven't got around to printing the cards yet, and as a last minute decision I decided to wing it. I haven't yet created a gridded version of Jacob Astley's Prayer. Here is what I decided on (turns are UGOIGO in the folowing sequence):

Victory Points
  • Victory would be acheived with 8 VPs
  • VPs scored for each unit eliminated and each general eliminated
To put this in perspective, the Royalists had 5 units of horse, 6 of foot and 1 of guns. Parliament had 7, 7 and 1 (although most horse and the artillery unit were stronger than the Royalists).

Shooting
  • Muskets - max two hexes (long range)
  • Guns - short 1 hex; medium up to 3; long 6 hexes
  • Pistols - now ranged combat, assumed part of melee. 
  • Muskets 3 dice per base, two at long range. Hit on 4,5,6.
  • Guns 3 at short range, two at medium. Hit on 4,5,6. Long range 2 dice, hit on 5 or 6.
  • Minus 1 die per hit marker
  • Minus 1 from dice if disordered
  • Saving throws: 6 horse, 5 or 6 for guns or cuirassiers 
  • Roll 1D6 for each unit each turn - foot start firing at long range on a 1 or 2.
  • 3 hits removes a base
Melee
  • Horse & pike 2 dice per base
  • Muskets - 1 dice per base
  • Minus 1 die per hit marker 
  • Minus 1 per dice if disordered
  • Hit on 4,5,6.
  • Saving throws 6 horse, 5 or 6 for cuirassiers
  • 3 hits removes a base
Movement
  • Foot one hex per turn, horse (of whatever type) two, and staff figures three hexes.
  • Minus 1 hex for crossing hedge and are disordered (one turn stationary to become ordered).
  • 1 hex if on road/trackway/in march column
  • Changing formation costs one move
  • No movement if the unit fired that turn
Orders
  • To commence moving, or to halt, or change formation (or any other change) a unit has to score 4,5,6 on a D6.
  • Plus 1 for general with, and plus 1 for each messenger figure.
  • Movement in first turn was 'free', but any unit that didn't move in the first turn had to test to see if it followed orders when it did want to commence moving.
  • Messengers move at 3 hexes in the movement phase.
  • Dice at each turn to determine how many messengers the Commanding General can deploy each turn (they start with the General).
A morale test would be needed if a unit lost a base through firing, or lost more bases in melee than the opponent, or if you want to stop a unit pursuing. Pass on adjusted score of 7 or more from 2D6.

Simple! Anything else I would decide on the spot. Decisions on the hoof included: could attempt to rally from rout if not pursued; general eliminated on a score of double 6 if with a unit that has suffered losses; pursuers occupy the same hex as routers.

The Royalists (top) have decided to attack all along the line rather than allowing isolated units be defeated piecmeal. 1 horse regiment is left in reserve. The Parliamentarians counter, with their cavalry swiftly advancing down the hill to meet the Royalists as they reach the meadow. You can see here how I messed up the drawing of the grid - what was I thinking?


Roundhead foot bravely (foolishly?) cross the hedge row to confront the advancing Royalist tercio.

The first Cavalier regiment has been crushed by a brigade of Roundheads, and the remnants sent back up Broad Lane. The second Royalist unit forms up to face the victorious, but disciplined Roundheads.

I did try inserting a video clip at this point but it won't play. 'Video!?' you exclaim. Yes, I 'cunningly' recorded the firework display in the school at the back of my house last night, downloaded it from my phone onto my laptop and then played it back whilst moving my camera around the table and recording it again. Well it beats making the bangs myself. The school concerned considerately always sets the firework launch point directly behind my house so I have a prime viewing point. In the dark I can imagine some bombardier with his lintstock firing mortars into some poor beleagured fortress like in the Last of the Mohicans movie. Each year the display is held on the Saturday the week following everyone else's presumably because, as a RC school, it doesn't want to be joining in with what was used as an excuse to oppress their forebears.

Alas for the King, the second Royalist regiment is seen off by the Rounhead horse (one regiment hitting it in front, the second, Heselrige's Lobsters, hitting them in the flank). Heselerige's regiment rallies whilst the other horse pursue.


At the eastern end of the field, the Roundheads defeat one regiment of Cavaliers, whilst the second decides that rather than charge headlong into the maelstrom, they would burst through the hedge and reform in the meadow where there was more space to deploy. The blue unit centre left is a Roundhead unit pursuing the defeated Cavalier regiment.
Meanwhile a brigade of foot from each side had clashed in a firefight, but seizing an opportunity to charge a Parliamentarian cavalry regiment pounces on a Royalist battalia and routs it.
In the centre the Royalists have had much better fortune. They have dispersed a brigade of Roundhead foot - see the gap where the two isolated staff figures are - this is the Night Owl himself with the now brigadeless 'brigadier'. The Royalist guns top left began whittling away at the enemy foot before being gradually ground down by the Parliamentarian guns opposite.


On the western flank (bottom) the Roundhead foot who climbed over the hedge in front of Hynton Ampner were cleared from the field but the Royalist foot have in turn been seen off by Parliament's cavalry. This was effectively game over for the Royalists, losing by 6 VPs to 8.

Post match analysis: horse attacking foot proved lethal. Too lethal probably. Horse units had 6-8 bases, foot only 3. Therefore without losses horse roll 12-16 dice and foot units only 4 (2 for pike). In the ungridded game this was less important as horse units tended to be smaller. This needs some adjustment. Maybe only 1 D6 per base for horse v foot, but keep the 2 D6 for pike v horse. Still an advantage for horse but foot can have a shot first and the odds are not so heavily weighted.

The game took about two and a half hours actual playing time, so pretty 'efficient'.  It might have been a bit longer if horse hadn't been so effective against foot - Parliament had plenty of spare units after seeing off most of the Royalist horse who could only attack piecemeal as in the real battle.

So after two attempts, the Royalists have lost both. The odds are really against them: (1) they are outnumbered; (2) the scenario rule makes their horse attack piecemeal. Maybe removing that scenario rule (which will make it less like Cheriton) will even up things sufficiently.

Mid-week match analysis: muskets at long range is too effective relative to short-range. Short-range remember uses 3 D6 and needs a score of 4,5, and 6. Long-range uses 2 D6 and also only needs a 4,5, or 6.  So by my maths, long-range is 2/3 as effective. If I reduce the number of dice to 1 then, if there  is 1 hit marker on the firing base it would reduce to 0D6 so impossible to hit anything. There are three other options here. (a) require a higher number on the dice roll. (b) Reduce the number of dice to 2. (c) A combination of the two.  The table below shows the average number of hits to be expected with the different options.
Number of Dice
Dice roll required

4,5,6
5,6
6
3
1.50
1.00
0.50
2
1.00
0.67
0.33
1
0.50
0.33
0.17

1 dice is ruled out for the reason mentioned above. Two likely candidates stand out for me: reduce to 2D6 and require a 5 or 6; and 3D6 requiring a score of a 6.  Just whether or not I think the odds of hits at long range should be 33% of the odds of a hit at short range or 44%. Who knows?