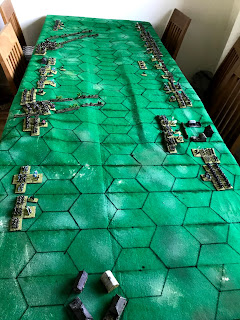
High ground was created as usual by DVD cases, then my now gridded, green baize cloth was thrown over the top. The table at 3 feet deep could fit 7 full hexes and two partial hexes (I would count units in these as being completely on the table if needed). I made a slight change in the layout compared to the previous outing. I added buildings representing the village of Hynton Ampner - I omitted it last time but a re-reading of Adair showed it figured a lot in the actual battle ......according to Adair. I placed a hedge row in the hexes in front of it representing the hedges along the road. As before, the Royalist horse had to suffer a scenario specific rule making them advance on to the field initialy via the hedge-lined Broad Lane and Alresford Lane before they could attempt to deploy in the meadow.
 |
| Initial set-up. Cavaliers to the left, Roundheads to the right. The lanes marked by the hedges in the left centre and top left. |
 |
| Two Parliamentarian battalia defend the hedges in front of Hynton Ampner. Four companies of dragoons behind to their left |
 |
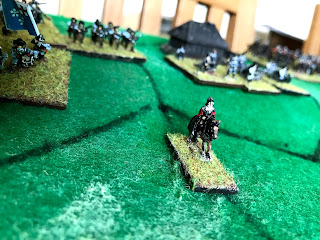
| Ralph himself, on the forward slope of what Adair terms the South Ridge. Confusingly on the north side of the battlefield. |
Victory Points
- Victory would be acheived with 8 VPs
- VPs scored for each unit eliminated and each general eliminated
Shooting
- Muskets - max two hexes (long range)
- Guns - short 1 hex; medium up to 3; long 6 hexes
- Pistols - now ranged combat, assumed part of melee.
- Muskets 3 dice per base, two at long range. Hit on 4,5,6.
- Guns 3 at short range, two at medium. Hit on 4,5,6. Long range 2 dice, hit on 5 or 6.
- Minus 1 die per hit marker
- Minus 1 from dice if disordered
- Saving throws: 6 horse, 5 or 6 for guns or cuirassiers
- Roll 1D6 for each unit each turn - foot start firing at long range on a 1 or 2.
- 3 hits removes a base
- Horse & pike 2 dice per base
- Muskets - 1 dice per base
- Minus 1 die per hit marker
- Minus 1 per dice if disordered
- Hit on 4,5,6.
- Saving throws 6 horse, 5 or 6 for cuirassiers
- 3 hits removes a base
- Foot one hex per turn, horse (of whatever type) two, and staff figures three hexes.
- Minus 1 hex for crossing hedge and are disordered (one turn stationary to become ordered).
- 1 hex if on road/trackway/in march column
- Changing formation costs one move
- No movement if the unit fired that turn
- To commence moving, or to halt, or change formation (or any other change) a unit has to score 4,5,6 on a D6.
- Plus 1 for general with, and plus 1 for each messenger figure.
- Movement in first turn was 'free', but any unit that didn't move in the first turn had to test to see if it followed orders when it did want to commence moving.
- Messengers move at 3 hexes in the movement phase.
- Dice at each turn to determine how many messengers the Commanding General can deploy each turn (they start with the General).
Simple! Anything else I would decide on the spot. Decisions on the hoof included: could attempt to rally from rout if not pursued; general eliminated on a score of double 6 if with a unit that has suffered losses; pursuers occupy the same hex as routers.
 |
| Roundhead foot bravely (foolishly?) cross the hedge row to confront the advancing Royalist tercio. |
 |
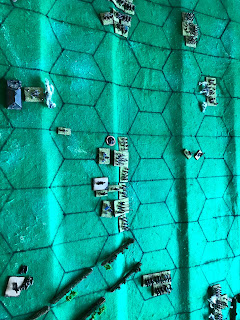
| Meanwhile a brigade of foot from each side had clashed in a firefight, but seizing an opportunity to charge a Parliamentarian cavalry regiment pounces on a Royalist battalia and routs it. |
The game took about two and a half hours actual playing time, so pretty 'efficient'. It might have been a bit longer if horse hadn't been so effective against foot - Parliament had plenty of spare units after seeing off most of the Royalist horse who could only attack piecemeal as in the real battle.
So after two attempts, the Royalists have lost both. The odds are really against them: (1) they are outnumbered; (2) the scenario rule makes their horse attack piecemeal. Maybe removing that scenario rule (which will make it less like Cheriton) will even up things sufficiently.
Mid-week match analysis: muskets at long range is too effective relative to short-range. Short-range remember uses 3 D6 and needs a score of 4,5, and 6. Long-range uses 2 D6 and also only needs a 4,5, or 6. So by my maths, long-range is 2/3 as effective. If I reduce the number of dice to 1 then, if there is 1 hit marker on the firing base it would reduce to 0D6 so impossible to hit anything. There are three other options here. (a) require a higher number on the dice roll. (b) Reduce the number of dice to 2. (c) A combination of the two. The table below shows the average number of hits to be expected with the different options.
|
Number of Dice
|
Dice roll required
|
||
|
|
4,5,6
|
5,6
|
6
|
|
3
|
1.50
|
1.00
|
0.50
|
|
2
|
1.00
|
0.67
|
0.33
|
|
1
|
0.50
|
0.33
|
0.17
|
1 dice is ruled out for the reason mentioned above. Two likely candidates stand out for me: reduce to 2D6 and require a 5 or 6; and 3D6 requiring a score of a 6. Just whether or not I think the odds of hits at long range should be 33% of the odds of a hit at short range or 44%. Who knows?


I insist you keep replaying this scenario until the Royalists win! Lol. Msr Foys latest "Ramekin" variant of his rules doesn't need the cards by the way. Might save you a lot of effort?!
ReplyDeleteI will try, if you promise to keep trying Lostwithiel until Parliament wins.
DeleteBroad Lane when I visited a few years ago.. :o)
ReplyDeletehttps://1.bp.blogspot.com/-aNPV7hC5mNY/TmnDEAJVIgI/AAAAAAAAEnA/1QriNpJeCGY/s640/P1010928.jpg
Not very broad is it 😀.
DeleteAbout 4mm in scale on the table top.
Great stuff. Good to see that Arthur's boys did well, per the 'script'.
ReplyDeleteYour description of the horse v foot factors does seem a little (ahistorically) biased in the former's favour!
I originally pinched the factors from Victory Without Quarter. They worked OK with my non-gridded rules but my horse units were only 4-6 troops (bases) strong. The contrast wasn't so great.
DeleteWhen I hexed it up I saw I could make horse units twice as strong fit in a hex, and saw that other rules also had horse units 4-500 strong. Then when I did my game last Sunday I sort of made it all up on the spot without reflection (hello Mr Johnson!) and ended up with a pig's ear. But I did 'get it done' quickly.
PS, and yes Arfur's Boys dun good. Perfectly timed and placed charges.
Delete“I swear on my sainted mother’s grave.”
DeletePPS thanks for the feedback on the combat factors by the way.
DeleteNow I must go.’er indoors wants to go shopping. Put that on Terry’s slate.