First thought was to stick the fake leather onto MDF stripes, build up a some banks, add some texture and vegetation and job done. The fly in the ointment was that I couldn't find MDF that was thin enough in any of the DIY stores. The thinnest was 6mm so the river would sit almost as high as my SYW lads and waist height to the ECW chaps. Then I thought I could get some perspex sheet that would be thin enough as a base. A quick search on Wickes' and B&Q's sites through up 2mm thick, clear acrylic sheet. Bingo! The sheet would go on top of the river.
OK. Good plan. Sheet purchased (not cheap - £21 for 60x120cm) after several tours of Kingston's one-way system trying to find the fabled alternative route to Wickes as the direct route was closed. Traffic already getting back to normal too. Damn. Now what size and shape strips should I make? 120cm is a good length overall for the model, giving enough room to show the different stages of a river. Keeping things simple seemed the best for now. The rivers could twist and turn and meander within say a 10cm range width which would do the job for the school project and be reasonably practical from a wargaming perspective.
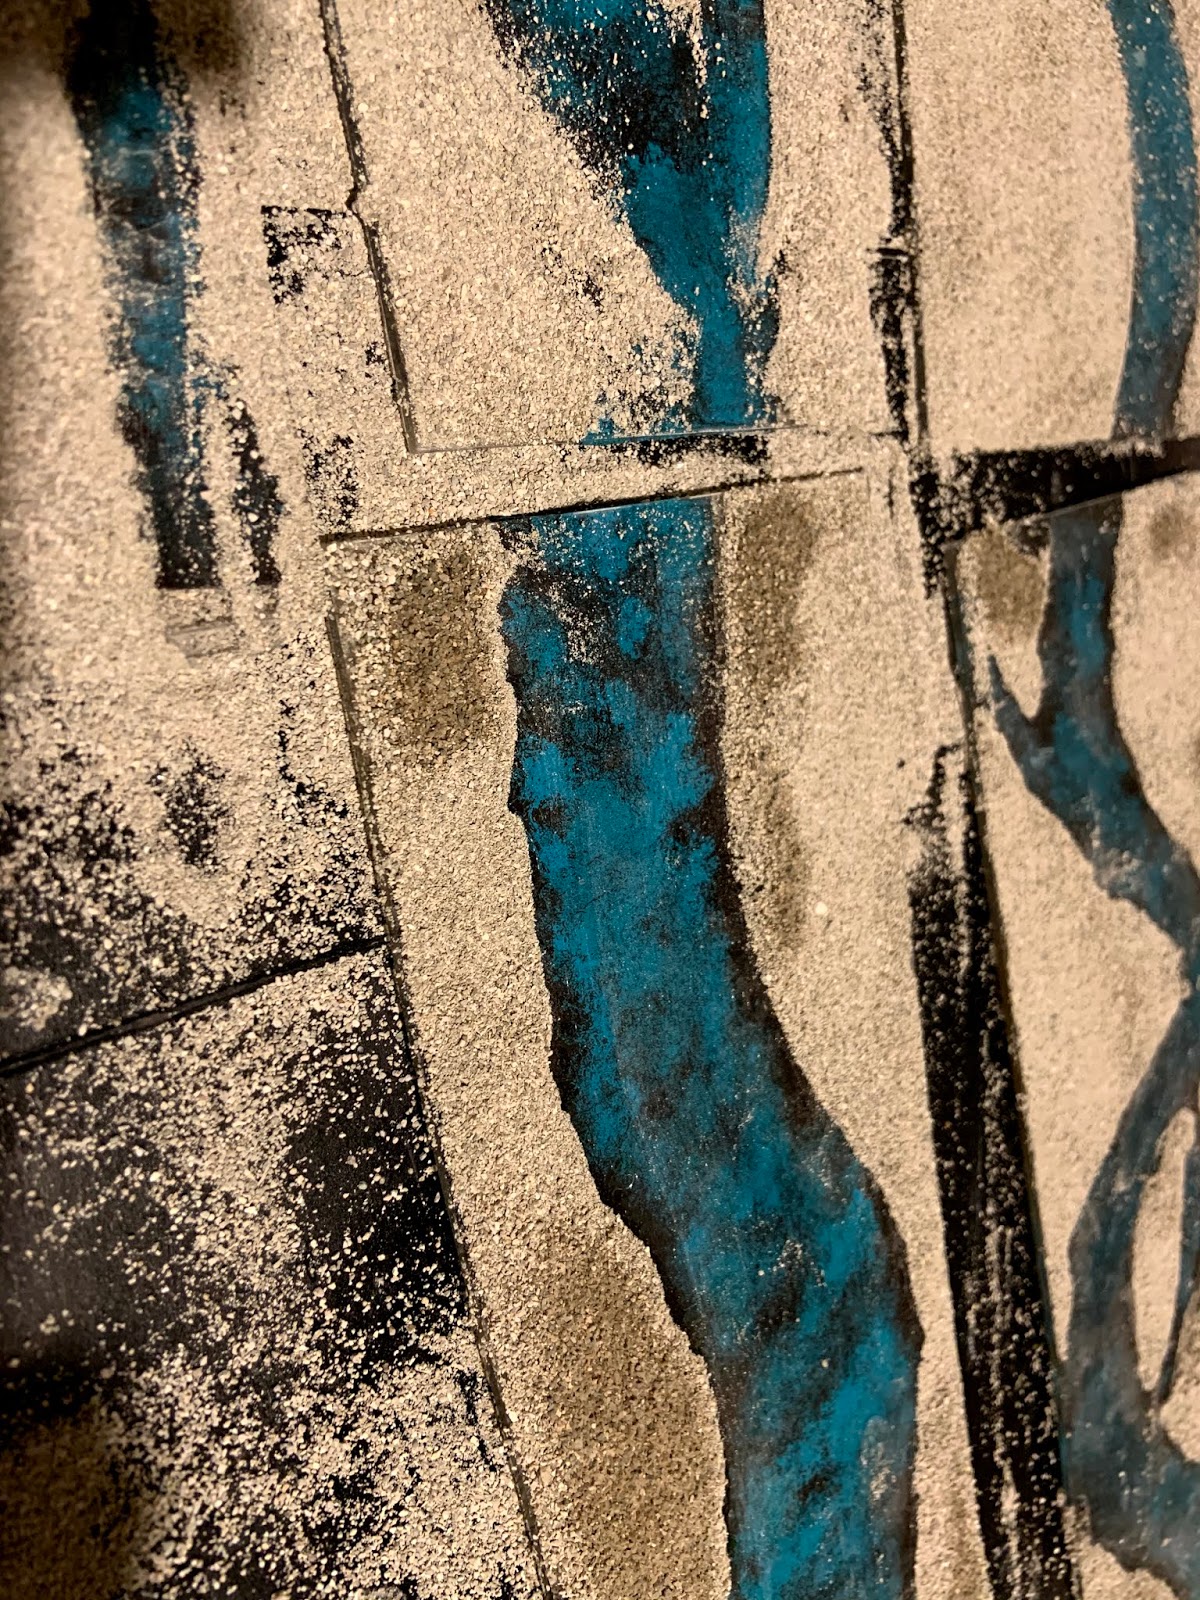
Cutting the acrylic sheet was a bit of a challenge and it took me a few goes to get the knack of it, so the two strips aren't a uniform width along their lengths. I then cut each long strip into 4 shorter ones, but for some reason that made sense at the time, one strip was a few centimetres longer which means they won't all fit in the old Ikea boxes. The girls chalked out the shape of their rivers on the back of the fake leather, complete with tributaries, and in one case distributaries, and then cut them out. These were then painted. I prefer brown-based rivers and suggested to the girls that they look at satellite images and decide on colours. They came back with blue-green. and I have to say they look pretty good. We cut the rivers into lengths to match the acrylic sheeting and glued them on using spray glue. It took several hours for them to dry properly but the material held and looked pretty good through the acrylic. There was even the bonus effect of a bubbling in the glue which gave a more fluid look to the 'water'.
Work in Progress
 |
| One of the rivers laid out on the garden table before 'texturing' the banks. This one ends in a delta. |
 |
| The 'delta' river after receiving its coat of sand. |
 |
| Close up of the delta river |
 |
| This is the other daughter's river, which ends in an estuary. You can see here that the acrylic sheet really gives depth to the 'water' |
Now to the texturing. I suggested the girls use the Baccus base texturing method. So using watered down PVA they sprinkled Chinchilla Dust* onto the edges of the rivers. We found that the diluted PVA sort of slips and leaves some bare patches so the PVA needs to be thicker than when gluing onto MDF bases. You also need to be quick. When dry, and the excess sand shaken off, it was painted with acrylic burnt umber. Later it was dry brushed in 3 successively lighter colours before static grass and foliage was glued to it.
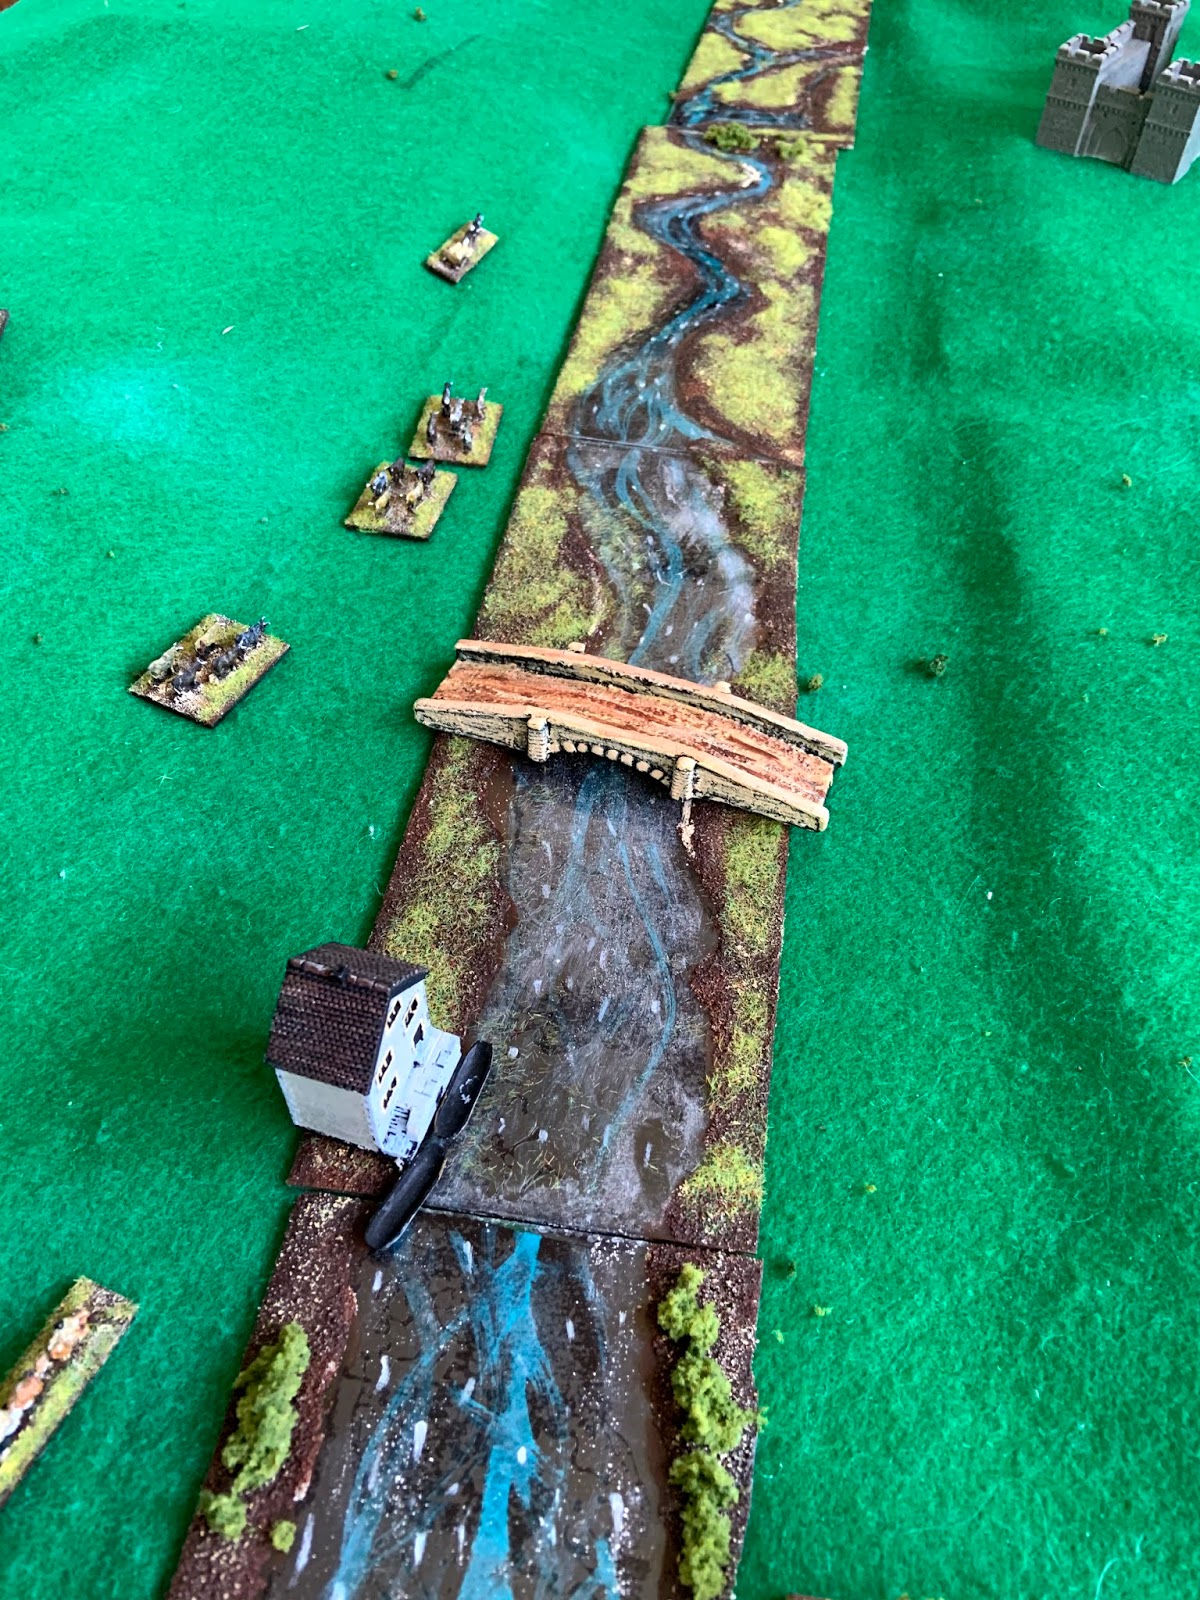
Once all this had dried I set the dining room table up for the photoshoot using the time honoured DVD box and felt cloth method. Then laid out the river sections and dressed the table with various buildings, cattle, trees and wagons.
 |
| Full view of the finished 'delta' river. |
 |
| Close up of the head waters of 'delta' river. You can see two problems here. One is the inconsistent widths of the acrylic strips. Secondly I misaligned some of the river material sections - it's tricky stuff. |
 |
| Full view of 'estuary' river. This one had more white paint speckles which I think helps. The banks are browner due to the different style taken with the highlighting and less 'grass' being used. |
 |
| Close up of 'estuary' river headwaters. Again the same misalignment problem. I really like the different channels. |
 |
| I like this one because the building near the bridge is reflected in the 'water'. |
Lessons and ideas for the future.
- It's easier to get straight strips when cutting the acrylic in shorter lengths.
- Clump foliage sticks better after it's been soaked in dilute PVA.
- I'll make the strips more consistent in length and make sure they fit in the box! I might cut a couple of cm off the end of the river mouths so those sections fit the box.
- Next time I'll try not using the fake leather as it's tricky to get it into the right position. I don't know if paint will adhere directly to the surface of the acrylic sheet, so I'll experiment with that and other materials underneath the sheeting.
- Also I'm giving thought to how I create bends in the river.
- I might clip off some of the corners of the strips where they are wildly misaligned so it's not so jarring.
- I'll have a crack at some lake and marsh sections.
- Finally, I'll make sections where the river width is consistent at the end of every strip so it's completely modular - I can vary the width between the ends.
* No chinchillas were harmed during the making of this terrain.
Late edit: the teacher one of my daughters (but not the other one’s teacher 🤔) responded very positively to the pictures she submitted of her project and asked if she would donate it to the Geography department. Hmm! Tricky one. It’s a bit like being asked to give up a new toy to a children’s home before you’ve played with it. Worthy cause but, like, I want it. This is also one of those odd situations when you have twins. I know that the skill and effort that’s gone into both pieces of work was equally good, yet if only one gets the credit .....
Late edit: the teacher one of my daughters (but not the other one’s teacher 🤔) responded very positively to the pictures she submitted of her project and asked if she would donate it to the Geography department. Hmm! Tricky one. It’s a bit like being asked to give up a new toy to a children’s home before you’ve played with it. Worthy cause but, like, I want it. This is also one of those odd situations when you have twins. I know that the skill and effort that’s gone into both pieces of work was equally good, yet if only one gets the credit .....
Interesting material and project,not to mention excellent end product. I look forward to seeing what will be achieved next time too. I am more comfortable with felt but you have tempted me to diversify.
ReplyDeleteCheers Alan. I’m a great believer in using whatever is good enough to get a game on the table. Hence the use of the leatherette material for years, and the masking tape roads. So if felt works stick with it. It has an old school charm about it.
DeleteI imagine it was a bit messy with the PVA glue, but the end result is very effective, especially the smaller tributaries.
ReplyDeleteThe PVA wasn’t too bad but the spray on glue (the sort used for carpets) was VERY sticky.
DeleteThanks for the reassurance on the chinchillas...I was worried!
ReplyDeleteI like the idea of the acrylic. Very creative. Sits nicely in the terrain.
Here at Casa Nundanket (formerly Schloß Nundanket until our rebranding) sustainability is in our DNA, so we wouldn’t hurt little furry animals. Apart from the foxes that the batty neighbour feeds.
DeleteThey look absolutely fabulous! Getting widths and lengths correct is a key to later flexibility and interchangeability isn't it?
ReplyDeleteThanks James. You’re absolutely right on consistency in dimensions. This was partly a failure in execution and partly down to a challenge posed by the materials in use.
DeletePVA and *very* fine beach sand are my choice for bases, plus only one highlighting dry-brush. But it's a great way to do basing. I love PVA :)
ReplyDeleteIt is certainly very versatile stuff KK. I thought 3 levels of highlighting was excessive until I tried it.
DeleteGreat looking rivers and excellent high jacking of a school project to help your gaming set up! Nice work!
ReplyDeleteBest Iain
Cheers Iain. I was chuffed with the way that they turned out. The school project was just too good an opportunity to miss.
Delete