The King has let it be known that he is weary of bearing the burden of the struggle, and wishes that the King of France returns his attention from his rivalry with the English to restoring the peace of the Empire against its would-be oppressors.
Such are the words of an imaginery Berlin 'spin doctor' (probably copied almost verbatim from the King's own instructions).
I played the game on Christmas Eve. Delayed from the Monday as I spent half the day exhausted in bed and the other half out walking. I finished setting up the table around 12 noon and completed the game by 3PM.
Scale
I took the orders of battle from the previous post on Soor and divided everything by the usual WRG troop scale, then by 3 to fit the space (and figures) available. Instead of being about 3 miles long the battlefield was about a mile (6 foot 6).
Each WRG element was represented by a base of my SYW 6mm troops on bases 60mm wide. Conveniently this is the recommended base width for an element (4 infantry/3 cavalry) in WRG. Artillery elements (1 gun figure representing 2 guns) in WRG are 40mm wide but my bases are only 30mm wide. As this represents 30 paces I thought this was a reasonable frontage for two guns anyway.
Infantry were combined in units (battalions) of 3 or 4 elements (bases) so there were 72-96 figures per battalion so 1 figure represented about 7 or 8 men. Cavalry units were mostly 4 elements (bases) to the unit with some 2, 3 and 5 elements strong and the Austrian elite units combined were a single base unit. At about 10 figures per base each figure represented approximately 12 men.
In total there were 122 cavalry and infantry elements plus 17 artillery elements. As I didn't have enough bases of cuirassiers for both sides I had to use some Russians as stand ins. Similarly for the Austrians, or more correctly the Austro-Saxons, I had to use a number of Russian infantry bases and the Saxons were represented by Bavarians.
Orders of Battle
Soor Refight Orders of Battle
|
|||||
PRUSSIAN
|
AUSTRIAN
|
||||
Infantry
|
Elements
|
Units
|
Elements
|
Units
|
|
Elite
|
11
|
3 Battalions
|
4
|
1 battalion
|
|
Veteran
|
18
|
5 Battalions
|
|||
Trained
|
49
|
13 battalions
|
|||
Cavalry
|
|||||
Elite cuirassiers
|
3
|
1 regiment
|
1
|
1 combined unit
|
|
Veteran cuirassiers
|
12
|
4 regiments
|
|||
Trained cuirassiers
|
13
|
4 regiments
|
|||
Trained dragoons
|
4
|
2 regiments
|
7
|
2 regiments
|
|
Irregular soldier cavalry (hussars)
|
2
|
1 units - off attacking Prussian camp
|
|||
Artillery
|
|||||
Heavy guns
|
2
|
1 battery
|
7
|
3 batteries
|
|
Light guns
|
3
|
battalion pieces
|
5
|
battalion pieces
|
|
Map, Scenario & Objectives
The game was played from the point when the Prussians were formed up and were launching their attack. I took the positions from the map given in Duffy's Frederick the Great: a Military Life ('the Duffy map'). I measured out a scaled version of my table size (for this case 6.5 x 3 feet) onto a copy of the Duffy map. Then appended what each of the different formations consisted of for ease of setting up the table.
I started the game with some of the Austrians off table on the right wing. Entry was diced for after one or two turns (a 4,5 or 6 being required) provided that the point of entry was available to them. Any friendly or enemy troops in the way would prevent entry whilst the blockage lasted.
Furthermore, the right wing Austrian formations could not initiate any moves until getting a 4, 5 or 6 or until directly attacked. This meant that even when off table units were able to dice for entry they could not come on if the on table troops hadn't moved forward. This and the use of off-table troops was an attempt to model the rather supine nature of the Austrians tactics, as well as levelling up the odds. Without it the Austrians would have been able to roll-up the Prussian left quite quickly.
The Prussians Primary Objective was to seize and hold the Graner Koppe. The Secondary Objective was to seize and hold Burkersdorf. The Austrians' aim was to prevent this.
The Game
So without further ado, here is the re-fight told in pictures with captions.
 |
| View of the whole array looking in a northerly direction. Austrians to the west, Prussians to the east. The village of Burkersdorf in the head of the valley. The large Austrian concentration at the top is on the Graner Koppe. |
 |
| Closer view of the Prussians. The cavalry wing at the far end set up within charge range of the Austrian horse on the hill - in the historical battle, the Austrians received the charge at the halt so this was reasonable. |
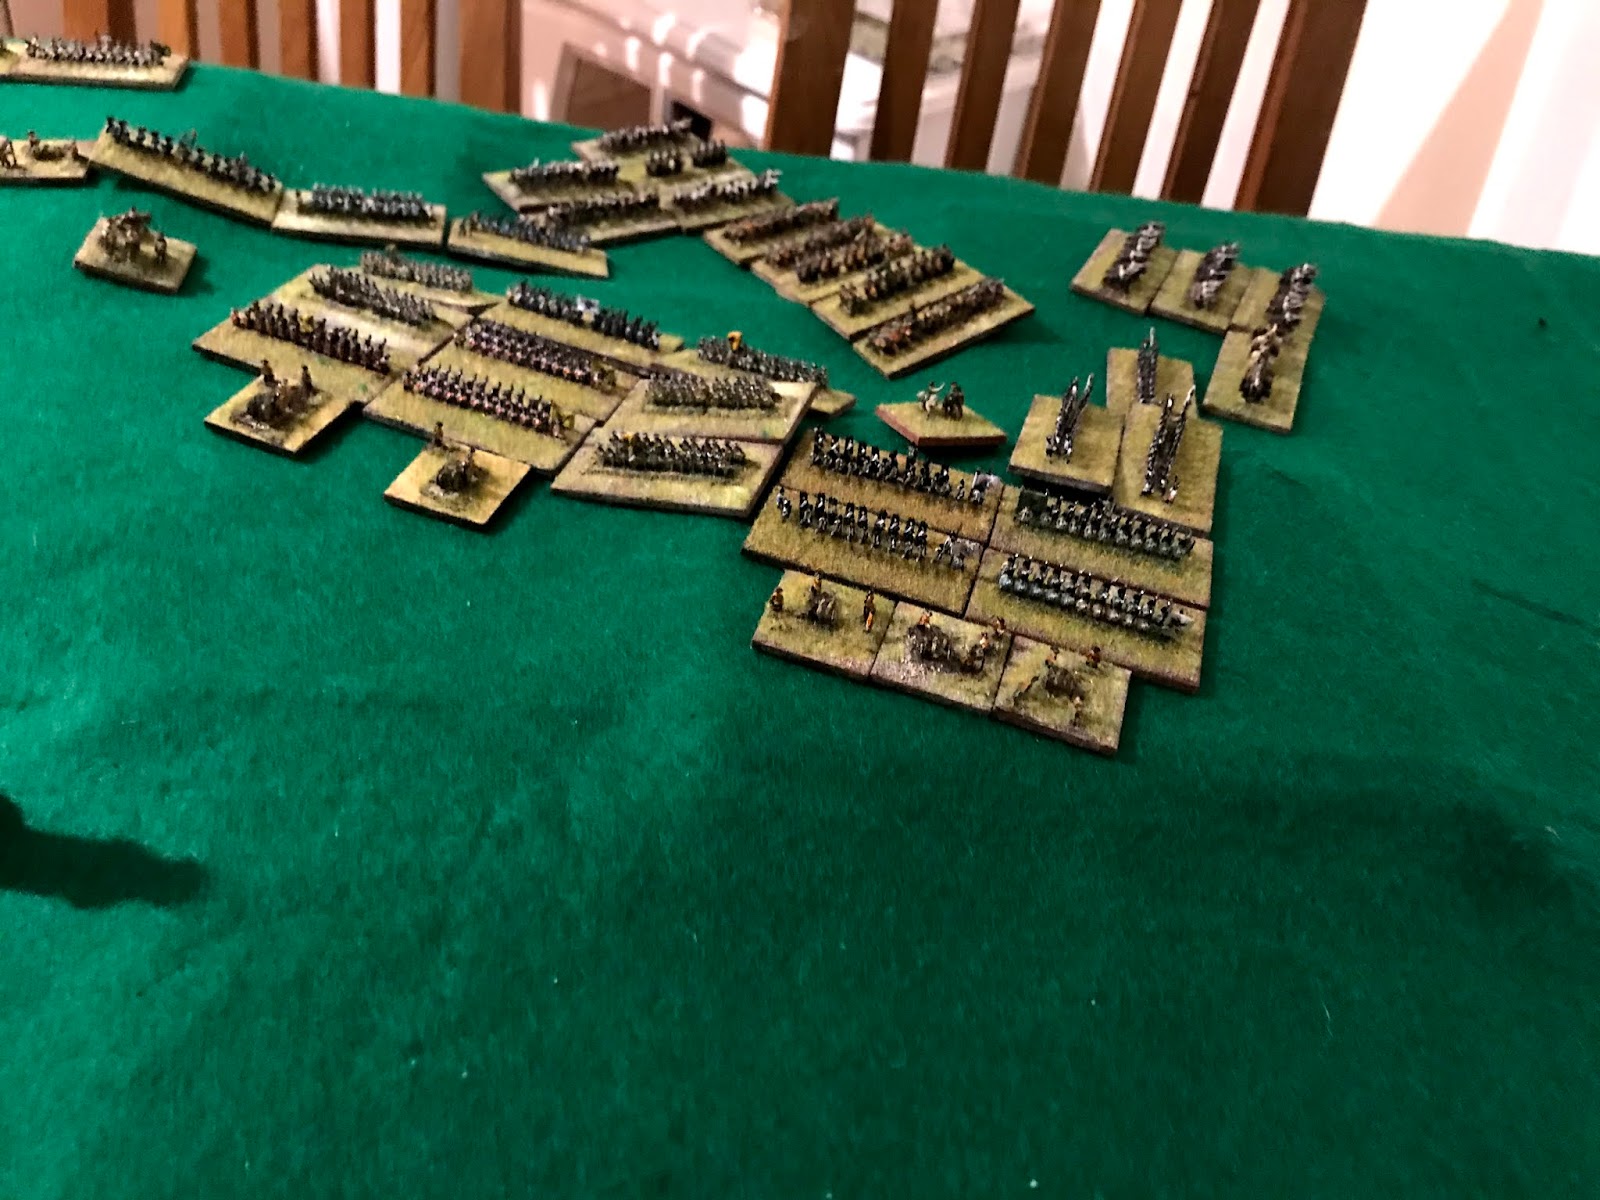 |
| Close up of the Graner Koppe. A tough nut to crack? Elite companies of infantry (grenadiers) behind the 3 gun model battery. The elite infantry here were over-represented but I allowed for the elite Saxon units historically elsewhere. |
 |
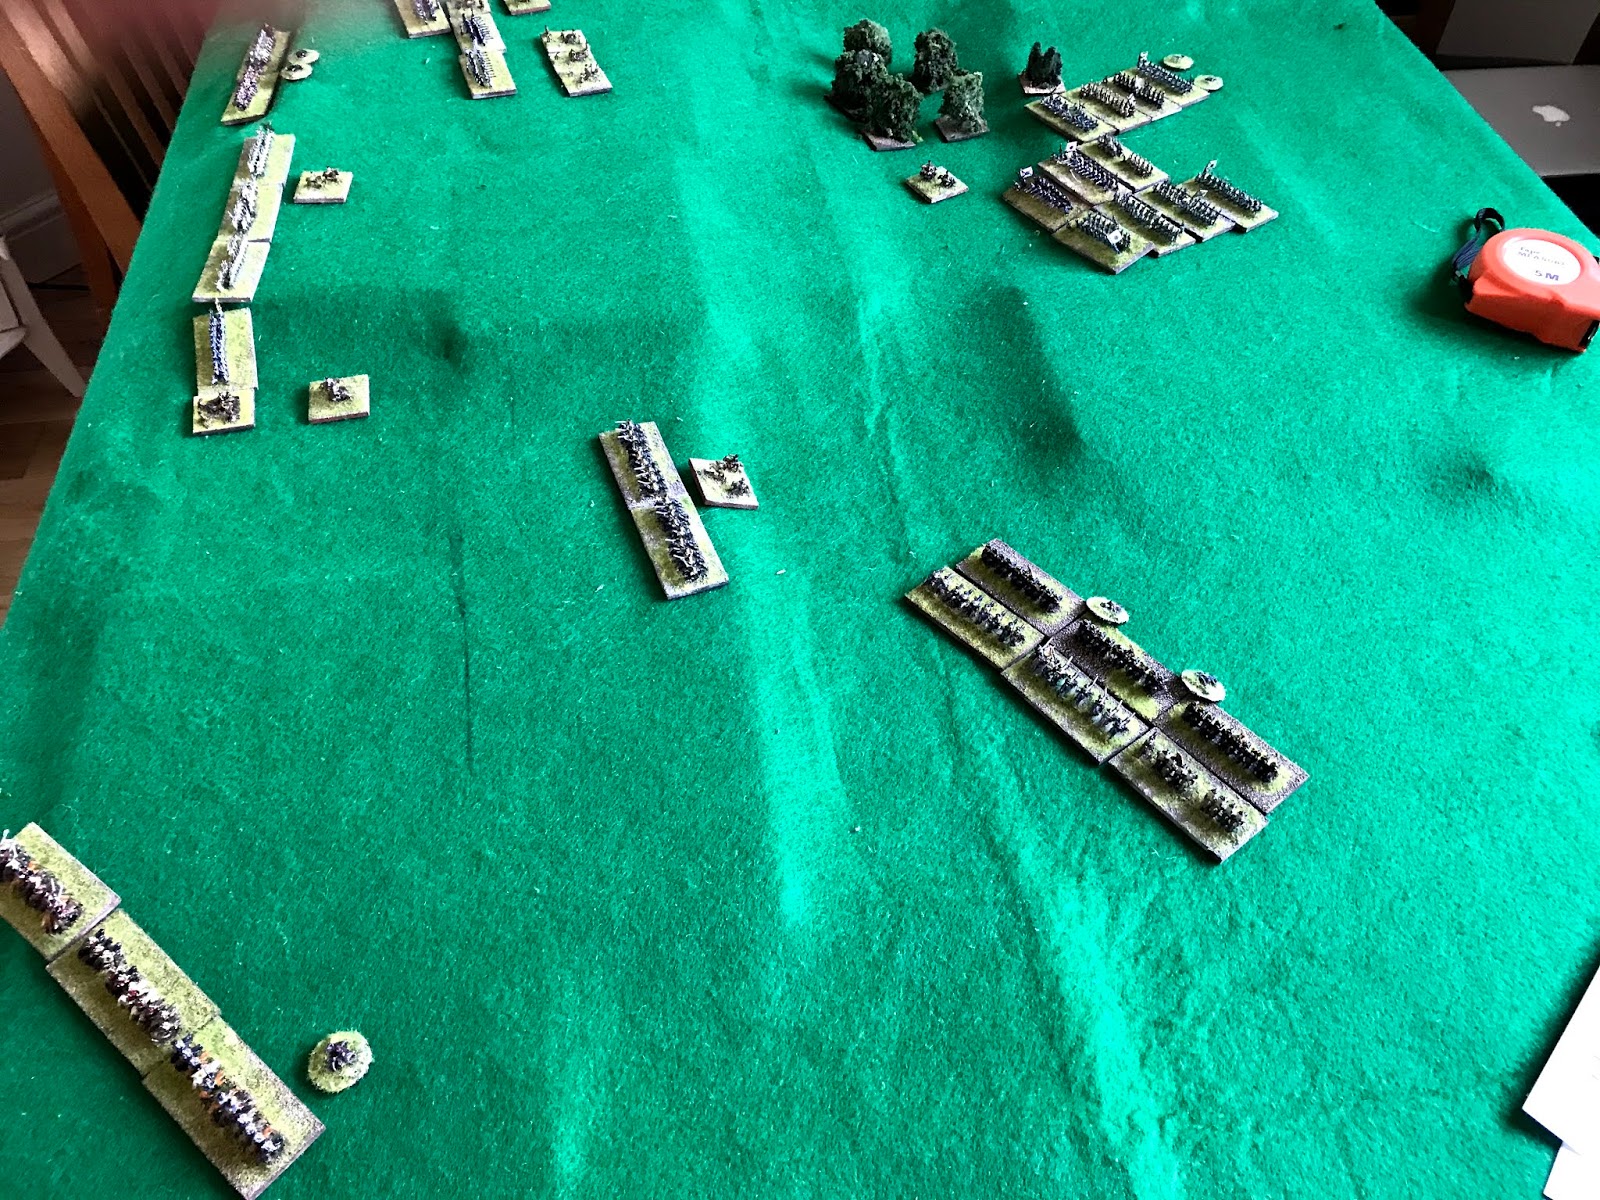
| The southern end of the field. At this point the Prussians have the advantage with on-table cavalry. Off-table, behind the two long rows of Austrians lie further horse and foot. |
 |
| Close up of the Prussian left wing cavalry. The bases in the near ground are Irregular Miniatures cavalry painted as Russian cuirasiers. |
 |
| The formidable lines of infantry on the Austrian right flank. |
 |
| The assault on the Graner Koppe goes in at the far end. The Prussian left wing infantry change direction and take shelter behind the wood from the Austrian battery in the centre. The Prussians left wing cuirassiers charge the Austrian horse and foot but lose an element in the process. The foot are routed off table but the cavalry battle doesn't go their way. One advantage in attacking this way is that the enemy if routed soon disappear off the table. They can dice to return after 3 turns but the chance isn't high. If by contrast you are routed you have room to rally on table unless you are pursued to destruction. |
 |
| Close up of the Graner Koppe action. The Austrian gunners fled immediately and the veteran Prussian cuirassiers crash into the Austrian grenadiers who initially proved a tough nut to crack. The elite (Gens d'Armes and Garde du Corps) Prussian cuirassiers don't have it easy either against their opposite numbers. |
 |
| The fighting on this key hill was confused and hung in the balance for some time. The round bases are to mark hits since I couldn't remove figures. 4 hits to remove a foot element and 3 to remove a cavalry element. With one hit an element would fight as if it was untouched - 2 or more and it couldn't fire/inflict hand-to-hand hits. |
 |
| The Prussian centre has occupied Burkersdorf and the Austrians begin to inch forward in response. Still no re-inforcements from the off-table troops. |
 |
| The left wing Prussian infantry decide to attack left of the wood once it is clear that the attack on the right is going well. There was to be an element of D'Erlons Corps at Ligny-Quatre Bras about this though. One unit ended up heading back towards Burkersdorf but never quite made it. In the foreground the defeated Prussian cuirassiers are being pursued (foreground centre) and an Austrian reinforcement of 3 dragoon elements enters bottom left. |
 |
| As the dragoons attack the remaining two elements of Prussian cuirassiers another cavalry reinforcement enters on the left of the picture. It's starting to look grim for the Prussians on this wing. |
 |
| Meanwhile, the Graner Koppe is nearly cleared. That's Prussian horse and infantry at the top of the hill. More bluecoats commence a firefight with the Austrian columns and the infantry in the village pour fire into the advancing Austrians who cannot hit back until they get to close range. Centre left is a Prussian cuirassier unit rallying after pursuit and the Saxons have formed a new flank to face them. |
 |
| Same stage as above but you can see half way up on the left the remaining two elemenqts of a Prussian cavalry unit have penetrated the centre of the Austrian position causing the second line to also refuse a flank. That small Prussian unit proves a nuuissance as until it is cleared off it stops more re-inforcements arriving. On the right of the picture the Prussian cavalry have rallied back on the infantry which is also bending back to stop the Austrian cavalry rolling them up. |
 |
| Three units of Austrian and Saxon foot form a cauldron (Kessel!) around that wayward unit of Prussian cavalry who launch a charge in a desparate bid to escape......and succeed! |

 |
| From the Graner Koppe the bluecoats line engages the Austrians in a fierce firefight gaining the upper hand because of their superior discipline (veteran versus elite). Following this Prussians in Burkersdorf are forced to retire by the Austrian artillery. |
 |
| With what can only be described as luck, in a renewed cavalry battle in the south, the Prussians prevail against superior numbers. In the north the Prussian cavalry have renewed their attack having cleared away all opposing horse, they begin to clear every remaining (and returning) Austrian infantry and artillery unit from the area around the Graner Koppe. Mainly because the clock was ticking down and I had to prepare for guests so decided it was time for the coup de grace. Now the whole Austrian position looks like it's squeezed from 3 sides. |
 |
| The final assualts on the hill go in. |
 |
| The end. One final Austrian infantry unit on the lower slopes of the Graner Koppe are about to be scattered to the winds by a cavalry flank attack. The column of 4 elements bottom right never did fire a shot - the Garde remain intact! The same cannot be said of the Prussian cavalry who retain but a fraction of their number having borne the brunt of the victory. |
Thoughts and Reflections
So pretty much a historical outcome albeit in one in which the Prussian cavalry bore more of the fighting on the hill. Also I had to hamstring the Austrians with a coule of 'scenario tweaks' in order to make a game of it. Apart from that, I played the rules unamended.
As I mentioned on Christmas Eve, the rules came back to me pretty well despite not having played them for I reckon 33 years! The absolute latest I could have played them was 1987 when I purchased my first H&R and Irregular 6mils with the proceeds from selling my Minifigs 25mm collection. But I think it was a good while before that. I think that is testament as much to the amount of times we played them at a young impressionable age, as to the clarity of the rules themselves. I had a quick skim through the rules before I played to refresh myself on the sequence and I had to check details a few times whilst I played, but pretty much I played by memory and the use of the quick reference sheet.
Would I change anything in the rules? Yes. I think cavalry is too effective against formed infantry. Command and control: it's a bit too easy to do what you want and too easy to telepathically co-ordinate disparate bdoies of men (e.g. the Kessel formed around the Prussian cavalry). Also without a massive table and teams of players they are really suited to 'divisional' or perhaps small corps-sized actions which were pretty thin on the ground in my preferred theatre of the SYW. But did I enjoy my game? Yes definitely. I was left wanting to have another go! Good fun.
As for the table, later that evening it was pressed into use for its original intended purpose when we had my son and elder daughter (both at their mother's whilst home from uni) plus their respective 'significant others' for dinner. So with the tytöt, Rouva Nundanket and myself we had 8 sat around the former battlefield. A good time was had by all and I was struck by the fact my elder two are both such drama 'luvvies', neither being shy to take turns at charades. What made it extra special for me was getting the two older offspring in the room together for such a long period for the second time this year. The previous occasion was when my other half finally made an honest man of me - I suppose that's one thing I have Nigel Falange to thank for ;-)
Enjoyed the game report with its introduction and after thoughts on the use of old rules. It is always good when your scenario tweaks work successfully and provide a good game with similar outcomes to history.
ReplyDeleteThanks Peter.
DeleteI was helped by the rules being so well balanced and having played them so often in the past it was relatively easy to predict how they would play out without the tweaks.
Your battle looks fab! Soor is not a battle to which I am familiar. With all of the scenario details you generously provide, I could give this a try with my 18mm collections and Honours of War. I am fighting my way through Kunersdorf at the moment but Soor my be the next WAS/SYW battle to see a presence on my table.
ReplyDeleteBattle in the morning and dinner in the evening sounds quite civilized. Well done!
Soor presents challenges, but after Kunersdorf it will be a cinch. If you are going to do Soor I highly recommend having a look at Obscure Battles http://obscurebattles.blogspot.com/2013/02/the-battle-of-soor-1745_23.html
DeleteIt's got lots of detail to help with the set-up, though less in the way of narrative (but as much as anything I've seen). There's also a simplified map on British Battles.com. I took the middle path and used the map in Duffy's Fred the G: A Military Life.
I might have a look to see if I have enough earthworks for Kunersdorf (I will have to pad out the Russians with Austrians).
Great impression of a massed battle, glad to hear it all came back rapidly, I agree the omnipotent gamer with total control is a downside of that period of game. At least you have something to thank Nigel Falange for ( presuming the misspelling was deliberate!)
ReplyDeleteBest Iain
Misspelling?! Whatever could you mean? ;-)
Delete