Sunday, 28 February 2021

Superfast Mollwitz - Twilight of the Soldier Kings

At under an hour, this was probably the fastest ever game I've played, apart from initial games of WRG with 2 or 3 units aside. Old School Tony contacted me the other day about his acquisition of Hallmark War of the League of Augsburg figures* and the Twilight of the Sun King rules by Nicholas Dorrell. OST was enthusiastic about the rules and used the phrase "less is more", so I thought they must be worth a look. He sent links to Mr Dorrell's YouTube account where he explains the principles of the rules and runs through some sample games.

* They look nice little figures (15mm).

As well as the Twilight of the Sun King rules, the author has also developed variants for the earlier 17th century (Twilight of the Divine Right) and for the mid-18th century (Twilight of the Soldier Kings). Mr Dorrell takes you through a turn by turn sample game of the Soldier King rules - the battle of Strehla, 1760. The videos are so helpful, and the rules seemingly so simple, you almost don't need to buy the rules.

Twilight of the Soldier Kings - YouTube sample game

Despite being simple to pick up, the rules have much subtlety that make you do all the things a good eighteenth century general had to do on the field of battle. Like make sure your flanks are secure, and have a second line and even reserves handy. Combat is very brief - in the terminology of the rules a player with a unit in combat checks for the unit's 'morale' rather than the opposition checking for hits. In most games you check both. An elegant feature is that moves straight ahead don't cost anything, but any direction or formation change can only be undertaken by the player passing a simple dice test. General's can improve your chances - not by giving dice bonuses but by allowing you to re-take a failed test.

A standard unit (brigade) is made up of two bases of cavalry or infantry. Movement and firing are done in base widths.  So the usual statement of 'no re-basing necessary' holds. However, in a nice little piece of luck, the recommended base widths are 60mm wide. Just the size of my SYW bases (which originally derived from the Polemos basing convention).  [Of course Mollwitz was in the War(s) of the Austrian Succession and not the SYW]

Because it is dicey (literally), you have to be very careful if you are carrying out any fancy moves with the enemy around. You really need a second line close behind, especially for cavalry or a push back turns into a rout. At one point in my trial game, I wheeled two Austrian brigades across a stream and it was touch and go whether the second line would wheel into place in time.

My overall impression was that these rules seemed to have captured the deceptively simple elegance of Command & Colors, without the grid. This could spell the end of my experiments with my own SYW rules.

The rules can be ordered through the Wire Forest Wargamers website at:

https://www.wyrehistoricbooks.co.uk/catalogue/print-rules-scenarios

My order has gone off for the print version. There is a pdf version available but to be honest the saving isn't massive and I find it nicer and easier to have a printed version. The website has some downloadable scenarios too. I might have a look at Gross Jägersdorf and see how it's been tackled. That always looked a tricky one to game.

As I said before the game seems simple enough to learn just from the videos. I had to make up some rules on the spot for cavalry charging infantry as I didn't see how that was done. I probably made some other errors too. But the fact I could have a passable game (and with a near historical outcome) shows what a lean and robust set of rules Mr Dorrell has produced.

So how did my game go. Well the Prussian artillery bombarded the Austrian left wing cavalry in an attempt to stop them attacking the inferior Prussian cavalry. In true historical fashion, rather than "stand here and be shot like dogs", Römer's Austrian horse attacked. The cavalry combats went better on the left for the Prussians than historically, and slightly better on the right. I may have been too kind on the Prussians' ratings, but they did have some very good dice rolls in their favour. I made Frederick a '1' (average general) and Schwerin his nominal deputy a 2 and Neipperg the Austrian commander a 2 (2 means good in these rules). Other generals were classed as 1.

The starting positions. Austrians at the top. The Prussian second line is just out of shot at the bottom.


Römer's Austrian heavy cavalry crash into the weaker Prussian cavalry wing. This time Austrians are at the top. 

On the Prussian left, the Prussian cavalry  advanced to the attack whilst the Austrians are re-deploying across the stream.

In the centre the Prussian infantry comes under bombardment from the Austrian guns - this is really harassing fire under these rules, with the object of slowing down the Prussian advance.

The end is in sight for Neipperg's army. The Prussian left wing had exceptional luck routing both brigades of Austrian cavalry on that wing. Despite having the upper hand in the cavalry battle on the Prussian right, the Austrians have lost two brigades and the Prussians look to have sealed the flank with infantry. The attempt to wheel the line into the right angle slowed the Prussian infantry down and they never reached shooting range before I called a halt.

Maybe I'll refight it when the rules arrive and see what mistakes I made.

Tuesday, 23 February 2021

Les dragons volants

I made the first airborne (horse mounted) dragoons today. Before work I sprayed the British AWI light dragoons on a folded out cardboard box. I left them on the cardboard in the garden to dry because the smell of the paint solvent is terrible.

I looked through the French doors later to spot the cardboard 4 metres away. It took a while to find all of the little figures, most of which were in a flower bed (in fact caught up in a small, dark shrub). Not easy to spot something that small and black against a dark background. 

Doh! 🤦‍♂️

Saturday, 20 February 2021

The battle of Tyburgh, 1643

So on to the third game this week. Same table, bar a few tweaks. This time I guess the setting is somewhere in western England. Though the name Tyburgh sounds more north-eastern. I should have thought of that before. The split-rail fences were replace with hedges. The woods on the hills were drastically thinned out. The town buildings were given a more 'Jacobean' look. The wood on the low ridge became an orchard and a parish church appeared on the ridge to the south of the town.

Roving Parliamentarian troubleshooter, Colonel Sydenham Hill has been charged with the role of representative of the Committee of Safety and despatched to Hiserfordshire where the local Parliamentary commanders are having trouble holding their own against the Royalist gentry of the county. As well as acting as go between betwixt the Committee and the local association, Hill was to assess the situation and inform the Committee as to whether parliament really needed to despatch more money to the county or if they were faced with trimmers. Was the local association hedging their bets and not prosecuting the war as hard as it should be in case the King should prevail and hold them to account.

Hill was attending upon His Lordship the Earl of Momerset, present with his column some miles south west of the county town of Hiserford towards the Welch Marches. Momerset had a force of three fine regiments of foote, two of the county Trayned Bands, a brigade of splendidly accoutred horse including His Lordship's Lifeguard, and a well-equipped trayn consisting of a demi-cannon, a demi-culverin, 3 sakers, a falconette and 2 robinets. Always fond of his food, and with the figure to show for it, Momerset (later to be played on stage by Robert Morley) was entertaining the relatively ascetic Hill (ascetic by Momerset's standards anyway) to a splendid repast when a letter was delivered by His Lordship's equerry. Hill observed His Lordship's brow begin to glisten, his face flush with the heat of some troublesome humours, then he watched startled* as Momerset began to choke. Too late, Hill and the equerry realised His Lordship's predicament and gazed in horror as apoplexy seized the peer. Within seconds the man's face was slumped on the plate of goose intestines**.

* An unpleasant story was doing the rounds in London during the Protectorate that Hill had deliberately hesitated in coming to the Earl's aid, suspecting the peer of perfidy but unable to prove anything. His Lordship being incapacitated this way would solve the problem. It was further rumoured, after the Restoration, that Hill himself had started the first rumour in order to win favour with the Lord Protector. Naturally Hill denied this and claimed he was merely holding back from rising from his seat out of deference to the Earl. He 'didn't deign to interrupt His Lordship as he appeared to be contemplating some deep matter'.

** I have no idea what gourmands of the 1640s ate, but I'm sure it must have included something as unpleasant sounding as goose goose intestines.

Grasping the letter brought in by the equerry, Hill read the news it bore. The essence of the message was that Lord Pomfrey was on his way with the King's men and would 'expect account to be made from His Lordship for the signal favours showed him by the King.' Hill surmised that the rumours of Momerset's treachery were true and that there was not a moment to lose. He would have to take control of the situation with His Lordship apparently dying, and march to meet Pomfrey. Unfortunately bad news travels fast and the messenger who had delivered his message to Momerset's equerry had by now also repeated it in the camp. The horse didn't wait to try their mettle, knowing the rumours of Momerset's perfidy (why should they risk their necks) and made off over the hills to Hiserford, shortly followed by the trayn. The colonel's of the trayned band regiments promised to meet Hill on the road to Tyburgh, but when he reached the appointed meeting point word reached Hill that the trayned bands had also made their way to Hiserford where they would 'guard the arsenal and hold the city for King and Parliament'. Clearly they were hedging their bets.

All of this is a long-winded explanation of why Sydenham Hill found himself with 3 Batalia of foote at the small town (barely more than a village) of Tyburgh facing the Lord Pomfrey with 5 Battalia*** of foote and two of horse. Hill assessed the situation, and reckoning on secure flanks and the protection of a stout hedge that he could hold Pomfrey at the western marches of the county.

*** My spellchecker keeps wanting to change 'battalia' to Natalia. That would be inconvenient as to my knowledge Pendraken do not make castings of Eastern European gymnasts.

The prospect before Pomfrey. The road block by gabions. Regiments of foote either side of the road and one in reserve at the town. Orchard on the ridge to the left and church to the right.


I was using my own ECW rules for this encounter. Quite a long while since I've used them, so I was a bit rusty. I allocated two subordinates to Pomfrey and one to Hill, then diced for each leaders' initiative rating. The result:

Pomfrey 1 (the lowest)

Ponsonby (Royalist chorse) 3

Inglethorpe (Royalist foote) 1

Hill 2 (moderate)

Brindley (Parliament's right wing) 1

So a pretty bad bunch all round. After his initial burst of activity, Hill's disappointing show must have been brought on by the aftereffects of his dinner with Momerset. The first few turns were dicing for allocating 'messengers' to the various commands on each side. The more messengers allocated to a unit and the better the general's initiative rating, the better was the chance of the unit doing what the player wants. Each turn a D4 is rolled to see how many additional messengers each commander can deploy that turn - they move at 30cm each turn down the chain of command. Eventually Pomfrey got the two left hand battalia of foote marching (in column, pikes to the front) toward the hedge. 

One unit fixed the attention of the right wing unit of Roundheads whilst the other climbed the hedge and made for the ridge. Something had been lost in the message that this second unit got because they failed to turn right once over the hedge. [In my rules units continue to follow an order until a test is passed to change the order! Or until something stops them] By this time Hill had managed to swing his reserve unit round the ridge and got them to fire on the Royalist flanking unit. This was the thing that stopped the royalist march, luckily for the royalists.

The royalists attacking from left to right have pinned one Roundhead unit at the hedge. Already a combination of shooting and hand-to-hand has removed the Royalist's pike block. 3 casualties removes a base - the round based figures are casualty markers. The Roundhead reserve unit has come from the town and is ready to open fire.

Whilst the Roundheads demolish the unit who had made it over the hedge, and pushed back the one at the hedge, more Royalist foote began to bear down on the defenders. Meanwhile the Royalist horse, on their right remain in position fixing the attention of the Roundhead left.

The rightmost Royalist units heads towards the gap in the defenders' line. The unit adjacent to them has deployed in line hoping to have more luck by engaging the Roundheads in a fire fight.

Things begin to go really bad for the Royalists. They get the worst of the firefight above the road. Then the unit near the road, accompanied by Pomfrey, reaches the hedge by the barrier. As they begin to hack their way through they are met by the Roundhead reserves who have now been steered into the gap. The Parliamentarian left wing unit opens fire into the flank of the column, whilst the reserve pour shot in from the front. This is too much for flesh and blood. They recoil! And apparently worse, Pomfrey, eschewing his casque in order to be recognised, is laid low by a ball to the temple. (i.e. the Royalists rolled a double on 2D6 after receiving hits on the unit).

There was a turn when the Royalists could get no more messenger figures, which hampered their ability to change orders. I then diced for which of the two sub-commanders would seize control. Fortunately for the Royalists Ponsonby seized command on no authority but that which he displayed. (I diced for it)

Although the firefights and melee on the right had gone the way of the Roundheads, they had begun to pick up dangerous levels of casualties and were forced back from the hedgerow. For a while they remained held back where there was no risk of receiving further losses from shooting. It was beginning to look like a stand-off - i.e. a defensive victory.

The Roundheads had repulsed all attacks. So far. Most of the Royalist foote is spent.

There was nothing for it. Noticing the withdrawal of the Roundhead colours on their left, Ponsonby felt one more push might do it. Here was his chance to get noticed by Prince Rupert, and earn the gratitude of the King. First one regiment of horse ('the Blues') was set in motion, then the second ('the Browns'). At worst, the Blues could wear down the Roundhead foote, for the second line to deliver the coup de grace. Then Ponsonby spurred over to Inglethorpe and the foote to urge them on to one last effort.

The Blues were in luck, the Roundheads powder must have been poor for they delivered ineffective salvoes. Slowly the horse hacked their way through the hedge and on to the waiting musketeers (their attack was angled to hit the left shot wing). The foote broke and made their way through the field and then on to Tyburgh. Amazingly the Blues did not pursue, perhaps gaining their breath after the struggle through the hedgerow.

At some point in the centre, Inglethorpe was also shot, but this did not bother Ponsonby. He had horse and foote through the hedgerow now, and only two faltering battalia of foote facing him.The latter let of a pathetic hail of lead before being crashed into by the Blues. They dashed up the ridge into the orchard being ridden down by the Blues whose bloodlust was up, being faced by nothing more deadly than the Roundheads arses. Ponsonby had won the day. A tale to be passed down through the years and to inspire future generations of men who bore that proud name.

The Roundheads' doom is approaching.

Sydenham Hill was able to make it back to Hiserford first and was able to get his account to the Committee of Safety in London, with the note he snatched from Momerset's hand,  before any other news reached them. Accordingly Hill, who was a trusted observer let us not forget, had his version of events accepted but the Committee and he was cleared of any culpability. Indeed he was lauded for worsting 4 of the King's finest foote regiments (an exaggeration) and ridding Parliament of two nuisances in the form of Pomfrey and Inglethorpe. This did him no harm and later in the year he was handed an independent command in the Eastern Association (see the Lincolnshire Campaign).

Thursday, 18 February 2021

The defence of Tiipuri (Tiborg), 1944.

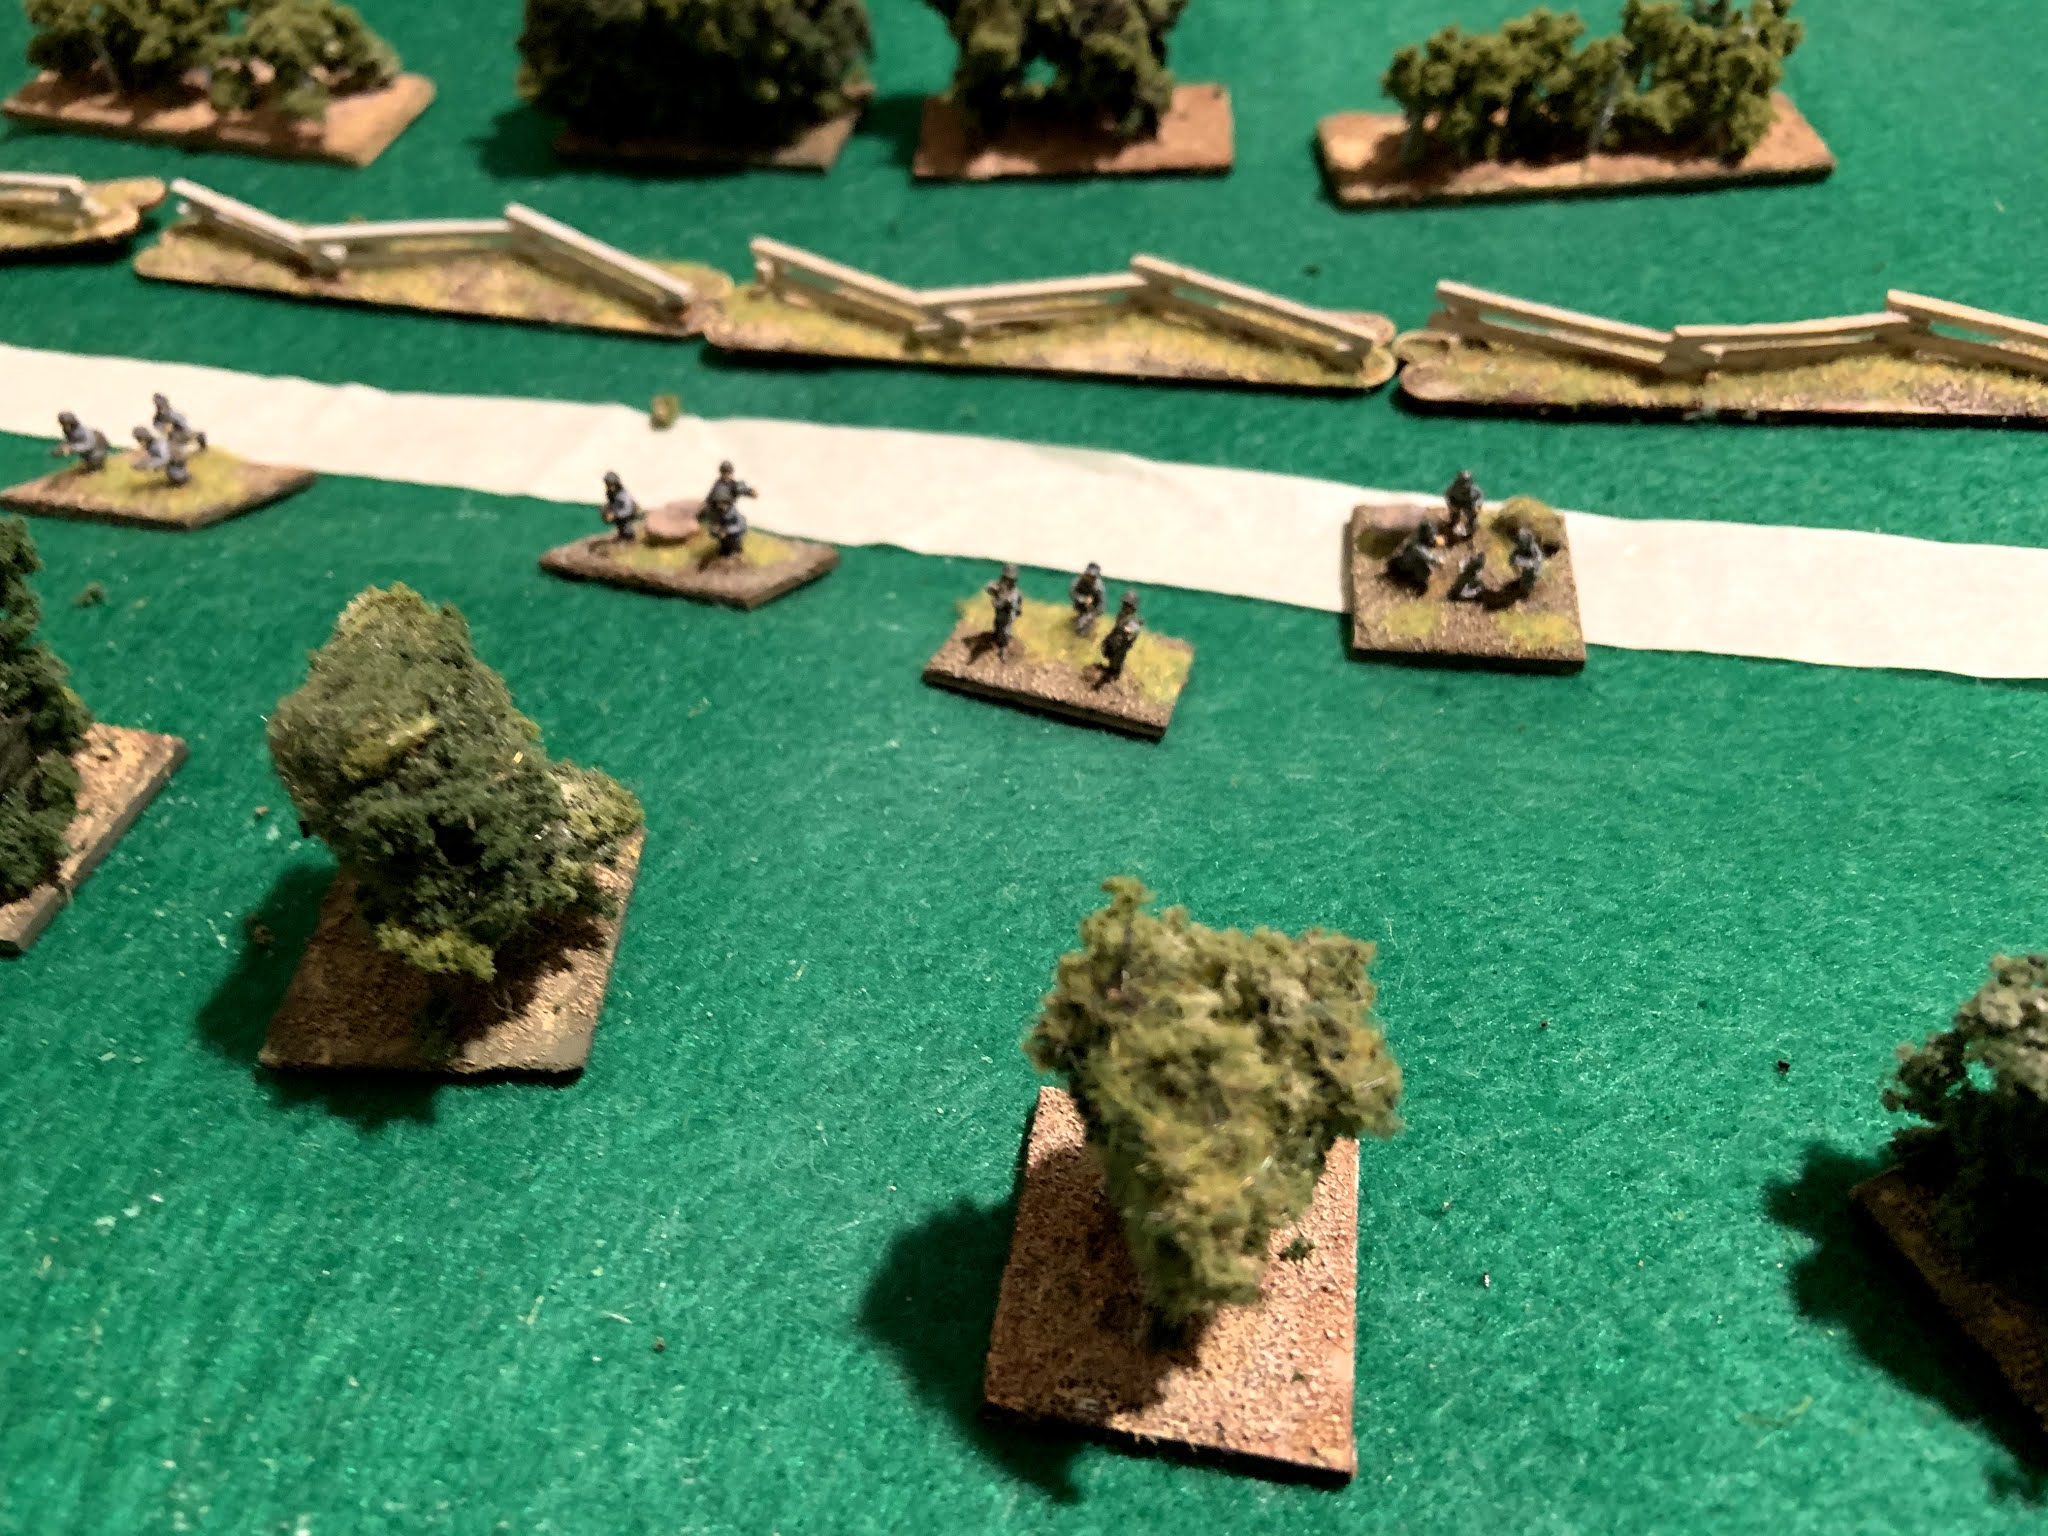
So the second instalment of One Position Three Wars took place tonight. The action was moved from the American Colonies/Southern U.States (depending on your view) in 1780 to Eastern Karelia/Karelian SSR (again depending on your view) in 1944. This time with added trees as befits the Taiga regions of the world.

I had 18 bases for the Finns and 34 for the Soviets. The Soviets, led by Major Vasilikov, were attacking across the short open plain between the forest of the east and the town of Tiipuri on the edge of further forested high ground to the west. With this number of bases I allowed each side a D12 to roll each turn for Leader Points ('LP').

Tulta munille poijat!*

Kapteeni Pekka Pitkahousut placed half his men on the front ridge in the fields and the rest on the reverse slope, in the sunken road (mortars) or in the town. The Soviets started with the initiative being the attackers, and for the first few turns retained it by rolling higher on their LP D12 each turn. This enabled them to pour infantry across the open ground, but they weren't allowed to bring artillery, mortars or air power to bear until the Finns revealed themselves by opening fire. 

Reserves and mortar on the reverse slope

Urra!!!

The defenders duly obliged. Early fire from the Finns was successful. Their mortars were zeroed in on the road and on the fence line (I gave them that advantage in the scenario) so it was easier to estimate where the Soviet assets were. Accordingly they were able to neutralise much of the Soviet mortar strength and quite quickly their MGs and rifles began to pin and mow down the advancing Soviet infantry. One turn alone accounted for 5 bases wide out! Very lucky dice rolling on the firing was making up for poorer LP rolling.


The results of the lucky shooting turn. Five 6s!

With their numbers, the Soviets were able to push forward more infantry to leapfrog their pinned comrades. When these began to get bogged down their LPs were used to unpin troops - but because I forgot to bring the Commissar unit into closer contact diminishing returns set in. It took me a while to think of using airstrikes. Three successive turns cleared much of the Finnish front line on the right including one mortar team in the road (lesson: nice neat lines do you no good!).  However, the Soviets luck began to run out. A sequence of ludicrously low LP rolls meant that the Soviet commander had limited options to get things moving again. The vast majority of them were pinned.

The attack getting bogged down. To mark pinned  status I turn the base at right angles, but there must be a better way. Note the measly 4 on the D12 to the left.

Because I had introduced a last minute rule giving a minus 1 to firing on pinned troops** on the basis that they were effectively in cover, the Finns didn't have anything to shoot at. Instead their mortars and off-board artillery pinned the Soviet commander in successive turns (the Commissar had also been pinned***). This meant a minus 2 on the Soviet's LP and in order to get things moving he had to unpin himself and try to dodge the incoming fire each turn. 

Another surge forward but it wasn't to last.

* This was an encouragement to Finnish soldiers not to aim too high. Picking a point on the body that was, ahem, at the lowest part of the torso. This saying actually cropped up on the Unbelieveable Truth panel game on Radio 4 recently. It's contrary to the advice in this bloodthirsty song: Silmien Välliin (between the eyes)

** This made it impossible to eliminate them by shooting.

*** In fact he got a 'panic' result and was only saved because there were no Finns infantry firing within range.

With nothing much to shoot at, one Finnish section moved close to some Soviet pinned infantry - who were promptly unpinned on a rare case occasion that the Sovs won the initiative and they close assaulted the rash Finns eliminating them.

One Soviet LMG team and their commander made it to the woods on the low ridge on the Finns' right. The commander had finally made it into dead ground where he couldn't be targeted by mortars or artillery. Unfortunately for him and the LMG team, this put them within close assault range of 4 Finnish sections, who pounced with the historic war cry of "hakkaa päälle" finishing the job with Suomi SMGs and grenades. I called the game at this point. The Finns had lost 6 bases (1/3) and the Soviets 17 (1/2).

X marks the spot(s) where Vasily Vasilyevich Vasilikov and the LMG team fell. It is said that Vasilikov deliberately sought his own death rather than face the music at brigade HQ.

Thoughts afterwards. I made mistakes on both sides. The Soviets could have used airstrikes sooner. The Finns were lined up ready to be strafed. I could have done with more Soviet infantry and difference in the Leader point dice. Say a D12 or D20 for the attackers and a D8 or D12 for the defenders. The game took about 90 minutes to complete. It would have been a bit quicker but I was stumbling around the rules for a while.

*****************

Coming up next, the Battle of Tyburgh 1643.


Wednesday, 17 February 2021

The Battle of Tyburgh, 1780

After successfully pushing through two rebel positions, Haberghan decided to push on to the mountains despite his first rate light infantry battalion taking a severe mauling. Rather than wait for reinforcements (it was doubtful Cornwallish could spare him any troops), the lively Yorkshireman pressed his advantage over the Americans. If he could seize the crossroads at Tyburgh he would possess one end of the pass through the mountains and severely inconvenience any support for the rebels from Kantuckee.

Haberghan was joined by Lieutenant Colonel Edward Ponsonby, despatched by Cornwallish to assess the situation and help him decide where his priorities lay. Ponsonby was not known for an optimistic disposition, and became known amongst his peers as ‘Pons Nay’. Haberghan rolled his eyes as he saw the General’s emissary approach, but knew he could use Eddie as an extra pair of eyes in the increasingly broken terrain.

‘Hannibal’ Smith on the American side had not been idle and knew command of the pass was vital. His experience in the French & Indian Wars counted for something. He was also joined by reinforcements. A further brigade of militia would help pad out the line, but even more welcome was a splendid new regiment of Continentals. More locals and mountain men arrived to fill the gaps in the other militia brigade and Boss Hogg’s Rifles. The only thing he lacked was artillery, having only one pair of six-pounders.

Overview of Tyburgh, British in the east (bottom), Americans in the west (top). The ground gradually rises to the rest but the transverse road is sunken.

Haberghan’s view.

A few hundred yards from the town Haberghan’s column comes under ineffectual fire from guns on the road ahead. There must be rebel infantry nearby so the column was ordered to deploy. The 10th Foot to the front and right, the Lights behind them and the 69th on the left and refused. The guns accompanied the 10th in their left, still limbered. Pons Nay was given immediate command of the 10th and guns.

The 10th and the guns advanced and as the Yellowbellies climbed the fence they came under a raking fire from the Continentals in the wheat field. Rather than immediately charge,  Ponsonby ordered the 10th to return fire whilst the artillery deployed. 


The Americans open fire first causing disorder in the British ranks. (See the D6 showing 4 D points). Haberghan is able to personally supervise the redressing of the ranks, mitigating some of the effects.

The Americans have suffered heavy casualties in the firefight and now the 10th go at them with the bayonet! Hurrah!!


The plan seemed to work after a while. The combined fire of the foot and the guns at short range inflicted significant casualties on the Americans and then Ponsonby times the charge to perfection routing the Rebels from the field. “Do you see how they wun sir! Wun you wascals!”

The Continentals clear the sunken road, over the next fence and up the further slope. Hannibal Smith had ordered the second regiment of Continentals to march from their position in reserve and try to beat the Britishers to the fence line.

Ponsonby was beginning to enjoy this. Haberghan, a decent chap even if he had a twace of a Yorkshire accent, had given him this chance to excel and overcome the perception that he was slow in seizing the initiative. He took his chance with both hands and a ‘view halloo!’ Spurred the 10th on. The victorious foot bounded over the next fence line with the Lights following. In game terms I would have slowed them down but their movement dice roll meant they had to clear the fence. This put them on the American side of the fence just as the second Continentals formed line.

A new firefight opens up. First blood to the Americans causes 3 disorder points meaning it would be risky for the Brits to launch a bayonet charge, so they return fire hoping the arrival of the Lights will swing things their way.

Disaster struck the British! Three balls struck Ponsonby. One harmlessly removed his hat. The second struck his left hand causing him to drop his reins. The third pierced his shoulder and threw him from his horse. Hors de combat the colonel would play no further part in the action. In game terms this meant the British lost the 3 Command Points that come with a ‘brigadier’. This meant that the troops in this wing had no orders and no help rallying off DPs. Haberghan had to abandon the centre and left and make his way to the faltering attack on the right.

Losses built up on the 10th.

Over on the American right Hoggs rifles were ordered to the other side of the road where they could support the Continentals.  They made it before the 69th could get close to them and the riflemen appeared in the rear of the 10th and Lights. And Haberghan was caught on the wrong side of the cordon!

No way out!

He could only look on in despair as the colours were lowered and he knew the blame would be laid at his door in Horse Guards.

********

Another enjoyable game with Loose Files and American Scramble. This one took about an hour. I packed the figures away but left the table set up got a Continuation War game. Combat at Tiborg (Tiipuri).

Sunday, 14 February 2021

Very Simple WWII Rules

Tradgardmastare expressed a passing interest in my WWII rules. I said I'd post them on here. I can't see how to add a document so I've shared them as a post. These are not quite back of a postcard but do fit on to one side of A4 paper (in Helvetica Neue, 10 so genuinely readable). They mainly fit such a small space because they are SIMPLE and probably have gaps that will leap out at you a mile off, but don't jump out at me. The idea was that they were specifically written for small scale actions in the Finno-Soviet conflicts of WWII, hence the title (Metsäsota '44: Forest War '44). But there's no reason why they won't be equally bad for anywhere else.

I wanted to get a game on the table quickly without having to acquire and read through several different WWII rulebooks to decide what I want to do. The second reason for the simplicity was because at the time of the first draft the hope was that I would get my small girls interested on the flimsy basis that their great grandfather fought in each of Finland's three wars from 1939-44. The toys sat in a box for years and I don't have a cat in hells chance of getting the girls interested now. They're also simple because I frankly do not know much about this period.  I finally got a game in last year after painting some more troops.

I play them with 10mm figures mounted on 3cm square bases. Usually there are 3 figures on a base except for heavy weapons which usually just have two men on them. A dozen bases a side works well. I could adjust the firing slightly if a section were all armed with SMGs, e.g. tank riders, (shorter range, but more dice) but otherwise they're considered built into a rifle section. Hitherto I haven't tried them with any AFVs so that section could well be written - in any case it is extremely simplistic!


Metsäsota ‘44


A base represents:

1 infantry section (rifle/SMG/mortar or MG); 1 artillery piece; 1 armoured fighting vehicle; 1 leader (HQ section - can be in vehicle or on foot).


Movement (in cm per turn):

If not under fire 20; fire & move: 10; under fire but not pinned 10; Pinned 0.

Woods, buildings, rocky ground half move. Swampy ground 1/4 move

Vehicles can only move through woods/swamp/cross river on road


Firing (ranges in cm; line of site, ‘LOS’, unless stated otherwise):

Roll 1 dice/base except L/HMG which can roll 2 dice but ceases fire next go or can keep 1 dice per turn. Consult table below for effect.

Cannot fire if pinned.

Woods, buildings, hills, vehicles block LOS and troops hidden unless they fire. Firing at these - 2 from dice. Prepared defences -3.

Artillery and aircraft: estimate co-ordinates (centimetres Eastings and Northings) and dice for fire effect on each base within 5cm of the spot for artillery and a strip 20 long x5cm wide for aircraft.

Bases will fire at nearest visible enemy base in range unless prevented from doing so by leader.

Bases already pinned are automatically wiped out if fired on by infantry within 5cm, otherwise deduct 2 from firer’s dice throw. 

Bases panicking are automatically wiped out if fired on by infantry within 10cm, otherwise add 1 to firer’s dice throw.


Firer type

Direct Fire

HMG

Indirect Fire*

Target Infantry/Artillery crew

Target vehicle (+2 to dice if target is not armoured)

Infantry

40

50

N/A

1, 2 No effect, 3,4 pinned, pinned, 5 panic, 6 wiped out.

Close Assault <5cm 4,5,6 wiped out

1-4 no effect; 5 pinned; 6 immobilised (Armour must be within 10 of firer).

Artillery/mortar/tanks

80 main arm.

50

Unlimited

1D6 for effect: 1, 2 No effect, 3 pinned (half tank’s fire effect dice), 4 pinned, 5 damaged (immobile), 6 blown up

Aircraft*

Unlimited

1,2,3 No effect; 4,5 pinned, 6 wiped out.

* providing the leader has troops in LOS of target and within 20cm of leader


Command and control:

1 leader base per side/player

Leader has N** Leader Points (‘LP’) to allocate. Leader under fire but not pinned: -1 point. Leader pinned - 2 points.

Can save points from turn to turn.


What you can do with Leader Points

1 leader point

Move 2 bases; get base to fire at nominated target; stop firing at target; retire from pinned location (can move normally again next turn)

2 leader points

Advance or shoot with pinned unit;

3 leader points

call off board artillery or for on board indirect artillery/armour fire

4 leader points

call air strike (Soviets only) - same procedure as off board artillery

Soviets with Commissar <20 cm

To advance from pinned roll 1-5 on D6. 6 = base wiped out.


** vague because different scenarios would suit different allocations. Usually I roll a dice each turn to determine how many Leader Points a side has. The type of die can be adjusted to suit different scenarios.


Reinforcements - WIP

After being delayed by a book*, on Friday I got started again on the various troops that I bought recently from Pendraken. Work continued on Saturday and I now have 3 fully completed units, one nearly finished and one getting there. As ever, I've gone for the 'impressionistic' approach - i.e. don't look too closely.

Continental Infantry regiment finished and American Militia unit  needs base finishing

Soviet riflemen (8 bases), Finnish bicycle infantry and 3 Panzershreck teams


Finnish bicycle troops. I may add some highlighting on the jackets  as the grey appears too dark.


The rest of the acquisitions are in various stages of painting. One unit of ECW foot needs their bases texturing, painting and flocking.

I've gone for purple this time. I've decided I have enough now to do one of the rare purple coated regiments.

Further down the queue are two more pike blocks, one musket block, 3 bases of dismounted dragoons and 3 foot command bases. All undercoated and flesh painted. Then come 3 AFVs undercoated. Still untouched are the AWI British light dragoons which I'm mulling over how to base. I don't think that they are going to arrive in time to help the British infantry tomorrow.

Not a bad effort in the time taken.

Postscript: I went over the ECW foot unit and dry-brushed them with Vallejo Magenta. I’m much happier with them now. And the unfinished troops will be almost complete tonight. I need a good run-up on the AFVs. I have NEVER painted any before.


* Chickenhawk by Robert Mason. The memoir of a US helicopter pilot in Vietnam. I've not read anything on the Vietnam War before and I'm finding this difficult to put down. I've got more interested in the conflict through watching Ken Burns' epic documentary series (much of it 3 times over). I have another thick 'survey' book of the whole war plus one on the war of liberation against the French in the 1950s. These were part of two large carrier bags full of history books my sister and brother-in-law was getting rid of. They were up in London recently and dropped them off on their way home. It was nice to see them but frustrating it was just a quick chat at the door given the prevailing situation.